How to Organize Kitchen for Maximum Efficiency
A kitchen that feels cluttered and frustrating can make even simple meals feel like a chore. Shockingly, studies show that organizing kitchen zones can cut meal prep time by up to 30 percent. Most people think organization means throwing out old utensils or buying fancy containers, but real transformation starts with understanding your space—and that can reveal problems and opportunities you never noticed before.
Table of Contents
- Step 1: Assess Your Current Kitchen Layout
- Step 2: Declutter Unused Items
- Step 3: Categorize Kitchen Essentials
- Step 4: Organize Using Effective Storage Solutions
- Step 5: Implement A Maintenance Routine
- Step 6: Evaluate And Adjust Organization As Needed
Quick Summary
| Key Point | Explanation |
|---|---|
| 1. Assess Your Kitchen Layout | Measure and document your kitchen to identify strengths and weaknesses. This sets the groundwork for effective organization. |
| 2. Declutter Unused Items | Sort through all kitchen items into keep, donate, and discard categories to create a streamlined space. |
| 3. Categorize Kitchen Essentials | Group items logically based on use, ensuring everything has a dedicated home that supports your cooking habits. |
| 4. Use Effective Storage Solutions | Implement smart, space-saving storage solutions to maximize functionality and ease of access in your kitchen. |
| 5. Maintain Your Organization | Establish a routine for daily resets and periodic reviews to keep your kitchen organized and functional over time. |
Step 1: Assess Your Current Kitchen Layout
Before diving into kitchen organization, you need a clear understanding of your current space. Assessing your kitchen layout is the critical first step toward creating a highly functional cooking environment. This process helps you identify strengths, weaknesses, and potential improvements in your kitchen’s design and workflow.
Start by grabbing a measuring tape and a notepad. Walk through your kitchen and carefully measure the dimensions of each area. Note the locations of major appliances like your refrigerator, stove, and sink. These form the primary work zones in most kitchens. Pay special attention to the distances between these key stations.
According to research from the University of Kentucky, creating specific zones for different kitchen functions can dramatically improve efficiency. Consider how you currently move between cooking, cleaning, and storage areas. Are there bottlenecks or awkward transitions? Do you find yourself constantly backtracking or feeling cramped?
Take photographs of your kitchen from multiple angles. These visual references will help you analyze the space more objectively. Look for unused corners, inefficient storage solutions, and areas where clutter tends to accumulate. Ask yourself some key questions:
- Where do you struggle most when preparing meals?
- What areas feel crowded or difficult to access?
- Are there any appliances or tools that feel awkwardly placed?
Measure your countertop space and cabinet storage carefully. Calculate the total available square footage and note any areas that feel underutilized. Your goal is to create a comprehensive snapshot of your current kitchen layout that will inform future organizational strategies.
By the end of this assessment, you should have a detailed document with measurements, observations, and potential improvement areas. This foundational work sets the stage for transforming your kitchen into a more efficient and enjoyable space.
Step 2: Declutter Unused Items
After assessing your kitchen layout, the next crucial step is decluttering unused items. This process eliminates unnecessary objects that consume valuable space and create visual chaos. Decluttering isn’t just about throwing things away it’s about creating a streamlined, functional cooking environment.
Begin by emptying every drawer, cabinet, and pantry shelf. Create three distinct sorting piles: keep, donate, and discard. Be ruthless in your evaluation. Pull out every single item and ask yourself: When was the last time I used this? Does this item serve a genuine purpose in my kitchen?
According to research from Mississippi State University Extension, start with small areas to avoid feeling overwhelmed. Focus on one cabinet or drawer at a time. This approach prevents mental fatigue and helps you make more deliberate decisions about your kitchen items.
Kitchen gadgets are notorious space hogs. Those single-purpose tools like avocado slicers, banana peelers, or specialized whisks often collect dust. If you haven’t used an item in the past year, it’s probably time to let it go. Multifunctional tools are your friends. A good chef’s knife can replace numerous specialized cutting implements.
Check expiration dates on spices, canned goods, and packaged items. Many people keep these far beyond their useful life. Toss anything expired or close to expiring. Pro tip: Rotate your pantry items regularly to prevent waste.
If you’re struggling with letting go, check out our comprehensive guide on kitchen decluttering for more detailed strategies. Consider donating gently used items to local shelters or community centers. Some kitchen items like extra baking pans or unused small appliances can be valuable to others.
By the end of this process, you should have significantly reduced your kitchen item inventory. Your remaining items should be things you truly use and love. A well-curated kitchen isn’t about having less it’s about having exactly what you need.
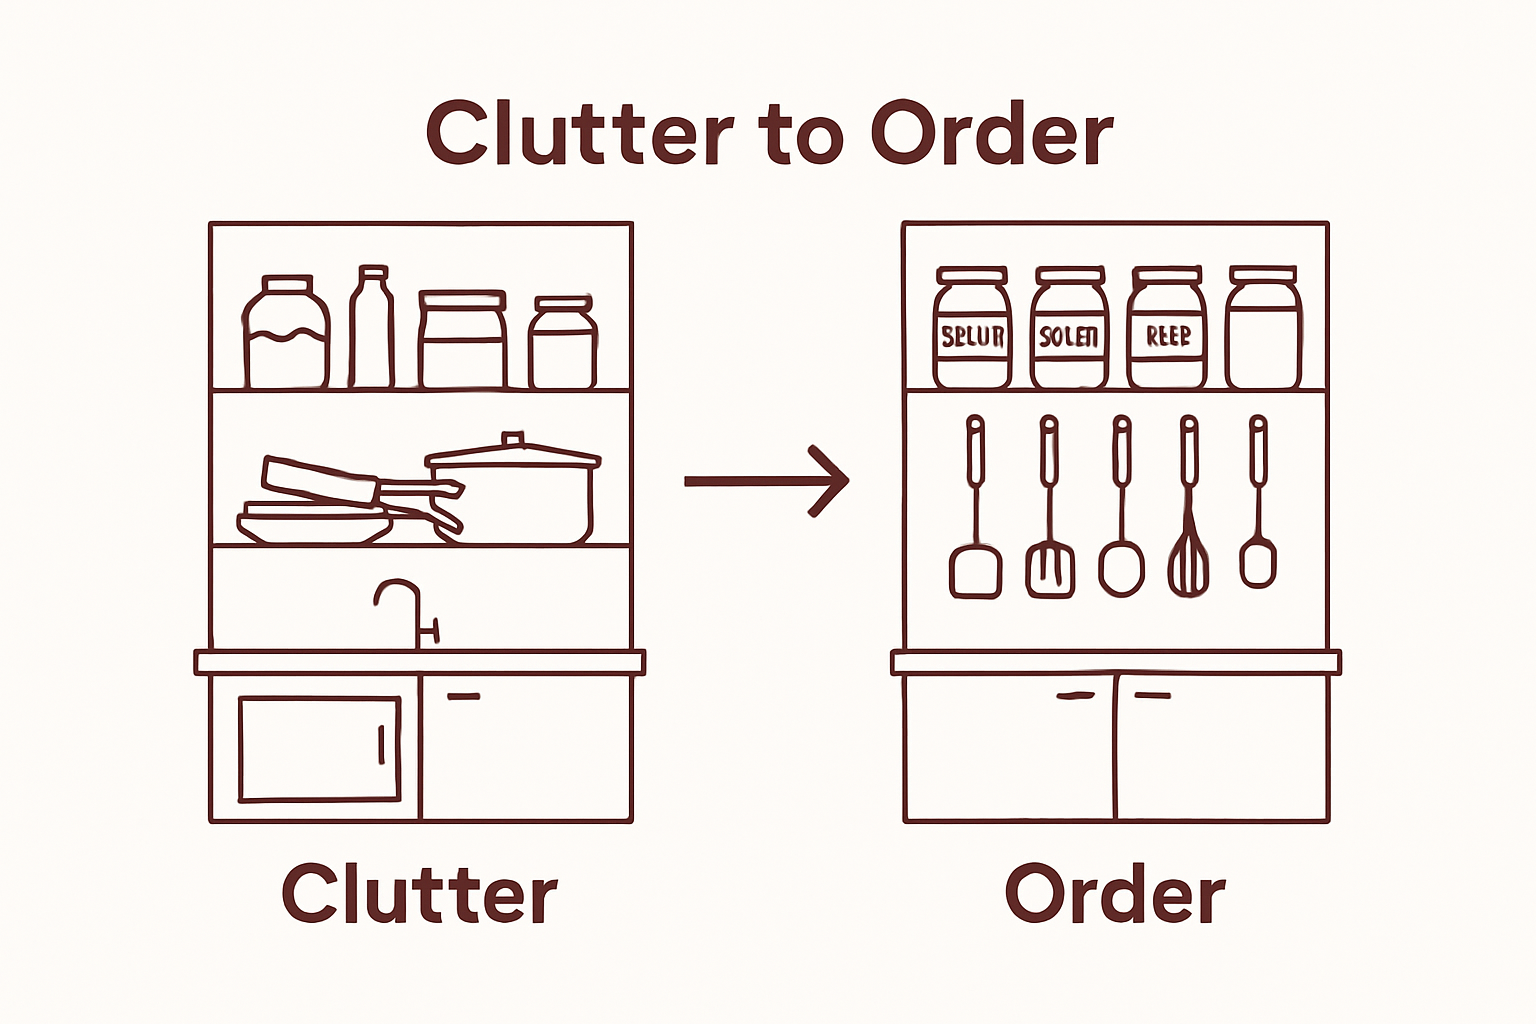
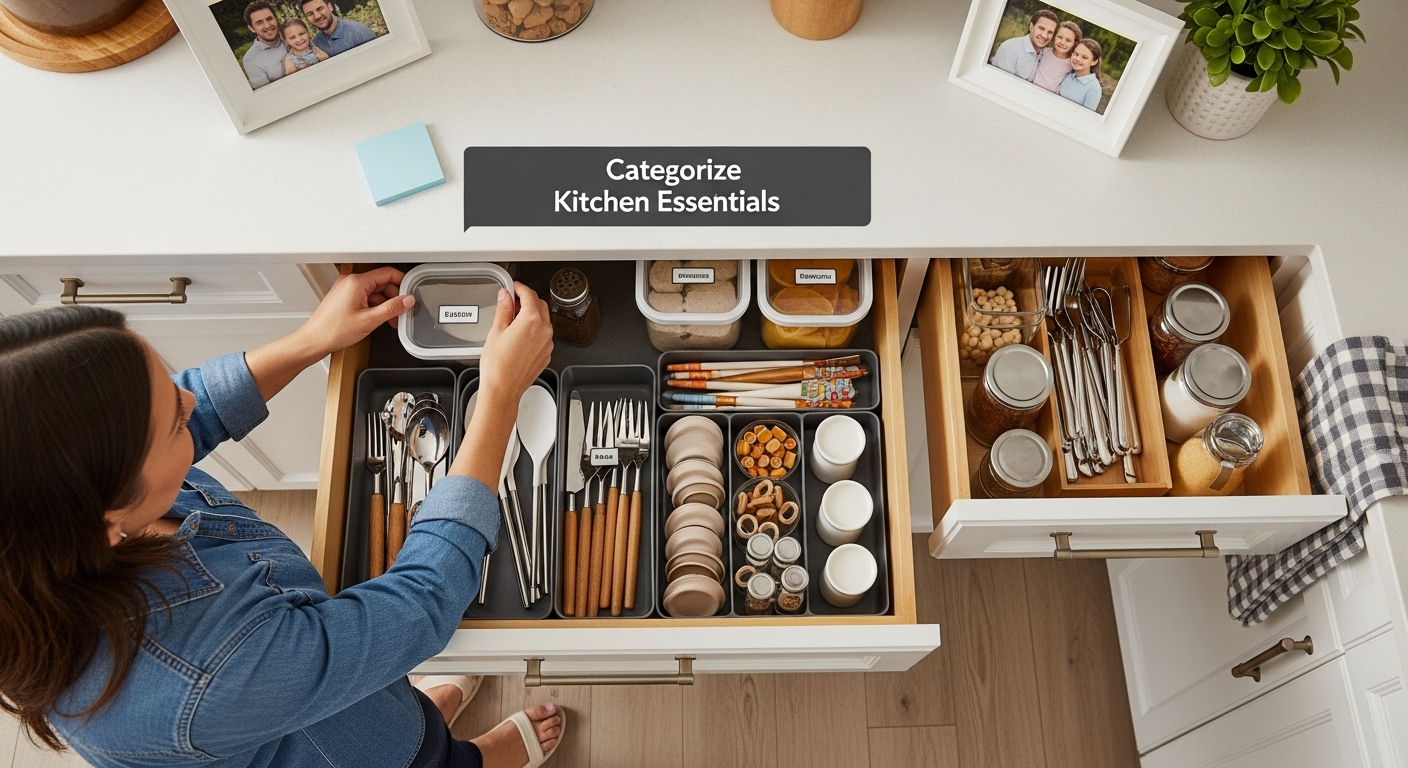
Step 3: Categorize Kitchen Essentials
After decluttering, the next critical step is strategically categorizing your kitchen essentials. This process transforms your kitchen from a chaotic space into a highly functional cooking zone. Effective categorization means every item has a logical home that supports your cooking workflow.
Start by grouping items into clear, practical categories. Cooking tools should be near the stove, including spatulas, whisks, wooden spoons, and measuring cups. Baking supplies like mixers, rolling pins, and cake pans belong together, preferably close to your primary workspace or in a dedicated cabinet. Sharp knives and cutting boards should cluster near each other, creating a dedicated food preparation zone.
According to research from the University of Kentucky, organizing kitchen items into specific zones helps streamline workflow and reduce unnecessary movements. Think about how you actually cook and prepare meals. Your categories should reflect your real cooking habits, not an idealized version of kitchen organization.
Consider creating specific zones for different functions. A breakfast station might include coffee makers, mugs, sweeteners, and breakfast-related tools. A cleaning zone near the sink should house dish soap, sponges, and drying racks. Store food storage containers together with their matching lids to prevent the notorious lid hunt during meal prep.
Vertical storage can be a game changer. Use shelf risers, hanging racks, and magnetic strips to maximize space. Drawer dividers help maintain your carefully created categories, preventing items from mixing and creating future chaos. Learn more about kitchen organization strategies to refine your approach.
Pro tip: Label storage areas if you live with others. Clear labeling helps everyone maintain the organizational system and ensures items return to their designated spots. By the end of this process, you should have a kitchen where every item has a clear, logical home that supports your cooking style.
Here is a table summarizing key organizational zones you can establish for maximum kitchen efficiency, with examples of what to store in each.
| Zone | Examples of Items | Suggested Location |
|---|---|---|
| Cooking Zone | Spatulas, whisks, measuring cups | Near stove or cooktop |
| Baking Zone | Mixer, rolling pin, cake pans | Near main workspace |
| Food Prep Zone | Knives, cutting boards | Close to sink or counter |
| Breakfast Station | Coffee maker, mugs, sweeteners | Near dining area or corner |
| Cleaning Zone | Soap, sponges, drying racks | Right by the sink |
| Pantry Zone | Dry goods, snacks, canned food | In pantry or large cabinet |
| Food Storage | Containers, matching lids | Near refrigerator |
Step 4: Organize Using Effective Storage Solutions
Storage solutions transform kitchen chaos into streamlined functionality. After categorizing your items, the next crucial step is implementing smart storage strategies that maximize every inch of available space. Think of your kitchen as a precision-engineered workspace where each item has a purposeful location.
Start by investing in clear, stackable containers for pantry items. Transparent storage allows you to quickly see what you have, preventing duplicate purchases and reducing food waste. Group similar items together: baking supplies, grains, snacks, and spices should each have dedicated containers. Mason jars work wonderfully for dry goods like pasta, rice, and beans, creating a uniform and visually appealing storage system.
According to research from the University of Kentucky, creating kitchen zones that streamline workflow is essential. Implement vertical storage solutions to utilize often overlooked spaces. Magnetic knife strips, hanging pot racks, and wall-mounted shelves can free up valuable counter and cabinet real estate. Under-cabinet hooks are perfect for hanging frequently used utensils, keeping them accessible yet out of the way.
Drawer dividers are game changers for maintaining organization. Separate your utensils, cooking tools, and gadgets into distinct compartments. Consider adjustable dividers that can adapt as your kitchen tools change. For lower cabinets, pull-out organizers and lazy Susans make accessing items in deep corners effortless. Corner spaces are notorious for becoming black holes of forgotten kitchen equipment.
Learn more about reducing household clutter to complement your storage strategy. Remember that effective storage isn’t about buying more containers it’s about creating intuitive systems that make your cooking experience smoother.
By the end of this process, every kitchen item should have a designated home. Open any drawer or cabinet, and you should immediately see what’s inside without shifting things around. Your storage solution is successful when finding and returning items becomes second nature.
Step 5: Implement a Maintenance Routine
A maintenance routine transforms your organized kitchen from a one-time project into a sustainable system. Without ongoing effort, even the most perfectly organized space can quickly return to chaos. Think of your kitchen maintenance like caring for a living ecosystem that requires consistent, mindful attention.
Create a daily 10-minute reset ritual. At the end of each day, return every item to its designated spot. Wipe down counters, clear stovetop surfaces, and quickly sweep the floor. This small investment prevents clutter from accumulating and maintains the organizational system you’ve worked hard to establish. Consistency is key make this routine as automatic as brushing your teeth.
According to research from the University of Kentucky, maintaining a functional kitchen involves optimizing layout and clearing clutter regularly. Implement a weekly deep clean where you:
- Check expiration dates in pantry and refrigerator
- Sanitize all surfaces thoroughly
- Reorganize and assess storage containers
- Wash rarely used items that might collect dust
Consider creating a simple checklist or using a digital reminder to keep yourself accountable. Some people find magnetic checklists on the refrigerator helpful, while others prefer smartphone apps that track cleaning and maintenance tasks.
Monthly maintenance takes your routine deeper. Pull out everything from one cabinet or drawer, clean the interior, and reassess your organizational system. Are there items you’re not using? Have your cooking habits changed? Flexibility is crucial. Your kitchen should evolve with your lifestyle.
Learn more about maintaining an organized home to complement your kitchen maintenance strategy. Remember, a well-maintained kitchen isn’t about perfection it’s about creating a functional space that supports your daily life. By dedicating small, consistent efforts, you’ll ensure your kitchen remains an efficient, enjoyable space for cooking and gathering.
Below is a maintenance routine checklist to help you keep your kitchen organized and functional long-term. Use this as a quick reference to stay on track.
| Task | Frequency | Key Actions |
|---|---|---|
| Daily Reset | Every day | Return items to their place, wipe counters, sweep |
| Weekly Deep Clean | Once a week | Sanitize surfaces, check expiration dates |
| Reorganize Containers | Once a week | Review and tidy food storage areas |
| Clean Rarely Used Items | Once a week | Wash infrequently used gadgets and tools |
| Monthly Cabinet Review | Once a month | Empty, clean, and reassess storage systems |
| Quarterly System Evaluation | Every 3 months | Assess functionality and adjust organization |
Step 6: Evaluate and Adjust Organization as Needed
Kitchen organization is not a one-time event but an ongoing process of refinement. Your cooking habits, lifestyle, and kitchen needs will continuously evolve, which means your organizational system must be flexible and adaptable. Think of your kitchen as a living space that grows and changes with you.
Schedule quarterly reviews of your kitchen organization. Set a specific date every three months to critically assess your current system. During these reviews, ask yourself tough questions about your kitchen’s functionality. Are you still struggling to find items? Do some storage solutions feel awkward or inconvenient? Honest self-evaluation is the key to maintaining an efficient kitchen.
Pay attention to your daily frustrations. If you find yourself repeatedly reaching over one item to grab another, it’s time to redesign that storage area. Kitchen organization should feel intuitive and smooth. Watch how you naturally move and work in the kitchen. Your organizational system should support your cooking rhythm, not fight against it.
Seasonality plays a significant role in kitchen organization. Cooking habits often change with seasons cooking heavy stews in winter versus light salads in summer. Adjust your storage and categorization to reflect these shifts. Store seasonal cooking tools and equipment more accessibly during their peak usage months.
Learn strategies for reducing household clutter to complement your ongoing organization efforts. Consider keeping a small notebook or digital note where you jot down organizational challenges as they arise. These real-time observations will be invaluable during your quarterly reviews.
Your verification of a successful organizational system is simple. If you can:
- Quickly find any kitchen item within 30 seconds
- Feel a sense of calm when you enter your kitchen
- Maintain your organization with minimal daily effort
Then you’ve created a truly effective kitchen organization strategy. Remember, perfection isn’t the goal flexibility and continuous improvement are.
Frequently Asked Questions
How can I assess my current kitchen layout effectively?
To assess your kitchen layout, measure the dimensions of each area, note appliance locations, and take photographs from multiple angles. Identify strengths and weaknesses in the design and workflow, paying close attention to high-traffic zones and bottlenecks.
What are some effective methods for decluttering my kitchen?
Start by emptying cabinets and drawers, creating three piles for keeping, donating, and discarding items. Focus on one area at a time to avoid feeling overwhelmed. Be sure to check expiration dates on food items and let go of unused gadgets to streamline your kitchen space.
How should I categorize my kitchen essentials for maximum efficiency?
Categorize your kitchen essentials by function, such as cooking tools near the stove and baking supplies in a dedicated space. Create specific zones for different activities—like a breakfast station or cleaning zone—ensuring items are located where they are most frequently used for easy access.
What are some smart storage solutions to organize my kitchen?
Utilize clear, stackable containers for pantry items to keep everything visible and organized. Implement vertical storage options, like magnetic strips for knives or hanging racks for pots, to maximize space. Drawer dividers can maintain order among utensils, ensuring that every item has a designated home.
Recommended
- Understanding the Kitchen Organization Guide for Better Cooking | Simple Neat Home
- 15 Things You Can Declutter From Your Kitchen RIGHT NOW
- 5 Easy Steps to Decluttering Your Kitchen Countertops
- Kitchen Organization Essentials | Simple Neat Home


