6 Steps to Organize Pantry for Maximum Efficiency
A messy pantry can turn every meal prep into a guessing game and waste your time week after week. Most people do not realize the average American household throws out over $1,500 worth of food each year due to expired or forgotten pantry goods. Surprising, right? Organizing your pantry is not just about clean shelves and pretty labels. It is a simple move that can save you serious money, cut down on food waste, and make family dinners less stressful starting tonight.
Table of Contents
- Step 1: Empty Your Pantry Completely
- Step 2: Clean And Assess Pantry Space
- Step 3: Sort Items By Category
- Step 4: Check Expiration Dates And Discard Old Items
- Step 5: Organize Items Into Labeled Containers
- Step 6: Verify Organization And Maintain Regularly
Quick Summary
| Key Point | Explanation |
|---|---|
| 1. Empty your pantry completely | Remove all items to evaluate and reorganize your pantry effectively. This helps identify what stays, what goes, and allows for a fresh start. |
| 2. Clean and assess thoroughly | Clean every surface meticulously and examine your pantry’s layout for potential improvements. This sets the foundation for better organization. |
| 3. Sort items into clear categories | Organize your food into specific groups like baking supplies and snacks. This clarity aids in locating items quickly and understanding what you have. |
| 4. Check expiration dates consistently | Regularly inspect all items for expiration dates and signs of spoilage. Discard expired items and donate non-expired goods that won’t be used. |
| 5. Maintain organization regularly | Conduct monthly reviews to check inventory, clean containers, and update labels. Consistent maintenance prevents disorganization and food waste. |
Step 1: Empty your pantry completely
Emptying your pantry is the crucial first step in creating an efficient and organized storage space. This foundational task allows you to reset and reimagine how you store and access your food items. By completely clearing out your pantry, you’ll gain a fresh perspective on your current storage setup and identify areas for improvement.
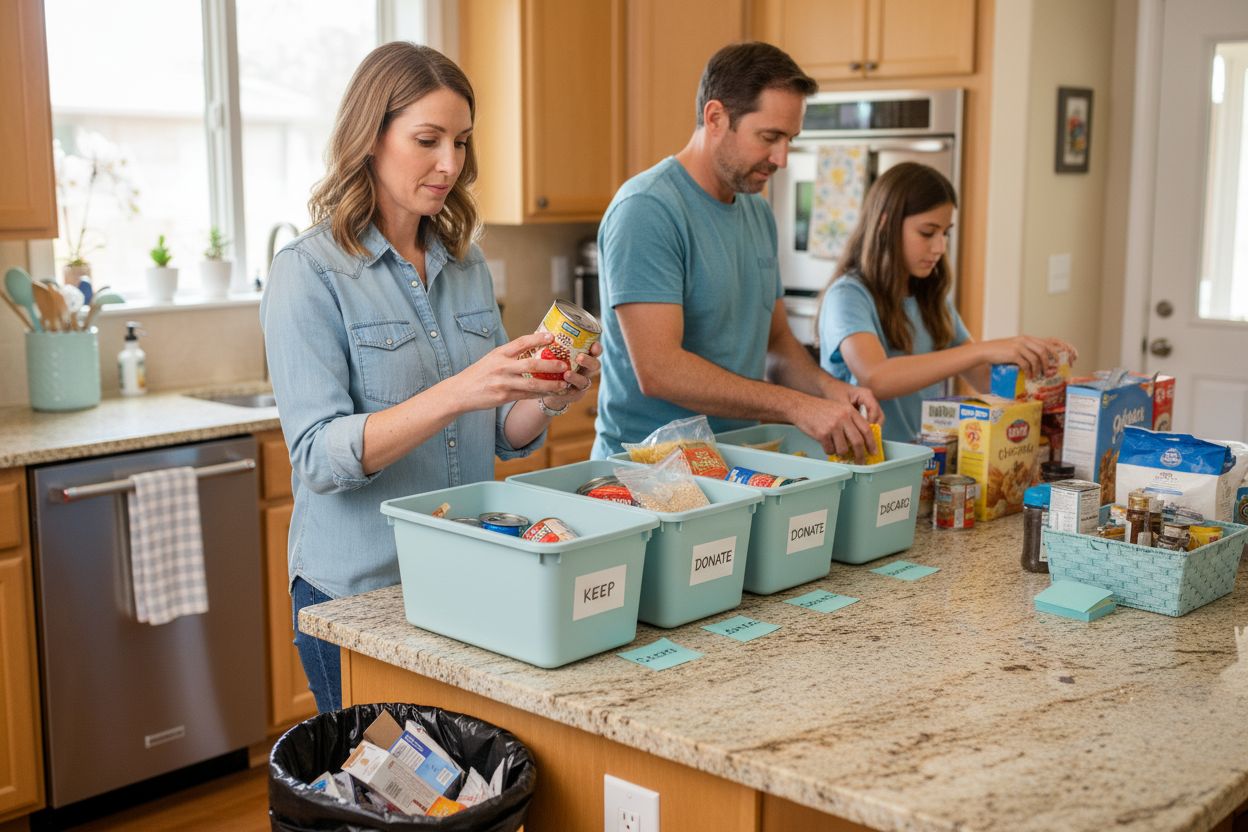
Begin by gathering a few essential tools to make the process smooth: sturdy plastic bins or large cardboard boxes, trash bags, a cleaning cloth, and some disinfectant spray. You’ll want to create separate staging areas for items you plan to keep, donate, and discard. Clear your kitchen counters or a nearby table to serve as your sorting station.
Carefully remove every single item from your pantry shelves, checking expiration dates and evaluating the condition of each product. This is an excellent opportunity to discard expired items and donate unexpired, unopened goods that you know your family won’t consume. As you remove items, group them by category such as baking supplies, canned goods, grains, and snacks. This initial sorting will make the reorganization process much easier.
While your pantry is empty, take the opportunity to thoroughly clean the entire space. Wipe down shelves with a disinfectant, vacuum or sweep any crumbs, and consider applying shelf liner for easier future cleaning. Pay special attention to corners and hard-to-reach areas where dust and debris tend to accumulate.
For those working with a smaller pantry space, check out our guide on organizing compact storage areas to maximize every inch of your available space. The emptying process might seem overwhelming, but breaking it down into manageable steps will help you stay focused and motivated.
As you complete this step, you’ll want to confirm you’ve successfully emptied the pantry by ensuring:
- All items have been removed
- Shelves are completely clear
- Surfaces are clean and dry
- Sorting bins are prepared for reorganization
This thorough approach sets the stage for transforming your pantry into an efficiently organized space that works perfectly for your household’s needs.
Here is a handy checklist table to help you verify that you’ve completed each main step for organizing your pantry efficiently.
| Step | Verification Checklist |
|---|---|
| Empty Pantry | All items removed, shelves clear, surfaces clean and dry, sorting bins prepared |
| Clean and Assess | All surfaces cleaned, shelves dry, noted repairs, lighting evaluated |
| Sort by Category | Items grouped, expired discarded, donatable separated, inventory created |
| Check Expiration Dates | Items checked, unsafe removed, donatable separated, good condition confirmed, disposal responsible |
| Organize Into Containers | All labeled, airtight containers, grouped logically, accessible, clear labels |
| Maintain Regularly | Monthly review done, expired removed, containers clean, inventory updated, family included |
Step 2: Clean and assess pantry space
Now that your pantry is empty, it’s time to transform the space from dusty and disorganized to clean and functional. Cleaning and assessing your pantry space is more than just a quick wipe down. This critical step involves carefully examining the actual structure, identifying potential improvement areas, and preparing a solid foundation for your reorganization effort.
Grab a few essential cleaning supplies: microfiber cloths, all-purpose cleaner, a scrub brush, and some protective gloves. Start by vacuuming any loose debris from shelves and corners, paying special attention to those hard-to-reach areas where crumbs and dust tend to accumulate. Use a damp cloth with mild cleaning solution to wipe down every surface thoroughly. Pro tip: For wooden shelves, avoid saturating the material and use a slightly damp cloth to prevent warping.
While cleaning, take a critical look at your pantry’s current configuration. Are the shelves the right height for your most frequently used items? Do you need additional storage solutions like pull-out drawers or adjustable shelf risers? Notice any signs of wear like peeling paint, loose brackets, or water damage that might need repair. Learn more about creating an efficient pantry layout with our comprehensive guide to help you make informed design decisions.
Consider the lighting and visibility in your pantry space. Natural light or good artificial lighting can make a significant difference in how easily you can locate items. If the space feels dark, you might want to install battery-operated LED lights or add a small plug-in light to improve visibility. This seemingly small detail can dramatically improve your pantry’s functionality.
As you complete this step, verify you’ve successfully cleaned and assessed your pantry by confirming:
- All surfaces are thoroughly cleaned
- Shelves are dry and free from dust
- Potential repair or improvement areas are noted
- Lighting and visibility have been evaluated
This meticulous cleaning and assessment sets the stage for creating a pantry that’s not just organized, but truly optimized for your household’s unique needs.
Here is a table outlining common pantry cleaning and organization supplies, along with their recommended uses and notes for best results.
| Tool/Supply | Purpose | Notes |
|---|---|---|
| Microfiber Cloths | Dusting and wiping surfaces | Gentle on shelves and effective for cleaning corners |
| All-Purpose Cleaner | Disinfects and removes grime | Use sparingly for non-wood surfaces |
| Scrub Brush | Tough stains or sticky spots | Useful for shelf brackets or stubborn residue |
| Protective Gloves | Hand protection during cleaning | Especially important when using stronger cleaners |
| Trash Bags | Disposing of expired or spoiled items | Have extra bags on hand for larger pantries |
| Plastic Bins/Boxes | Staging, sorting, and transporting items | Use separate bins for keep, donate, discard |
| Vacuum Cleaner | Removing crumbs and dust from shelves | Use hose attachment for hard-to-reach corners |
Step 3: Sort items by category
Sorting pantry items by category transforms chaos into a systematic, easy-to-navigate storage system. This crucial step will help you understand exactly what you have, what you need, and how to create a logical arrangement that makes meal preparation and grocery shopping a breeze.
Start by creating distinct grouping zones on your cleared workspace. Use large, sturdy containers or clean sections of your kitchen counter to establish categories like baking supplies, canned goods, grains and pasta, snacks, breakfast items, condiments, and spices. Be specific with your categories to ensure maximum organization. As you sort, you’ll want to simultaneously check expiration dates and the condition of each item.
For each category, create three potential piles: keep, donate, and discard. Expired items go directly in the trash, while unopened, non-expired goods that your family won’t consume can be donated to local food banks. This method not only helps you organize but also reduces food waste and supports your community. Pay attention to items nearing their expiration date and plan meals to use them quickly.
Consider the frequency of use when sorting. Items you use daily or weekly should be the most accessible. Check out our guide on creating efficient kitchen storage for additional tips on optimizing your space. Baking supplies might be stored higher up, while everyday breakfast items should be within easy reach. Group similar items together not just by type, but by how often you use them.
Take a moment to inventory what you have. This sorting process will help you understand your family’s eating habits and prevent overbuying. Create a quick list of staple items you always want to keep on hand, and note any gaps that need filling during your next grocery trip.
Verify you’ve successfully sorted your items by confirming:
- All items are grouped into clear categories
- Expired items have been discarded
- Donatable items are separated
- A rough inventory of your pantry contents is created
This methodical sorting sets the stage for a pantry that’s not just organized, but tailored perfectly to your household’s unique needs and eating habits.
Step 4: Check expiration dates and discard old items
Checking expiration dates is a critical step in maintaining a safe and efficient pantry. This process goes beyond simply removing old food items – it’s about protecting your family’s health, reducing food waste, and creating a streamlined storage system. Take your time and approach this task systematically and thoughtfully.
Begin by examining each item carefully, looking for printed expiration, best by, or use-by dates. Remember that these dates have different meanings: expiration dates indicate when food might become unsafe, while best-by dates suggest peak quality. According to food safety guidelines from the USDA, many shelf-stable items remain safe to consume even after their printed date, provided they’re stored correctly and show no signs of spoilage.
As you review each item, look beyond just the printed date. Check for signs of potential contamination like bulging cans, rusted metal, broken seals, or unusual odors. Dry goods like flour and rice can develop pantry moths or become rancid, so inspect them closely. Spices and baking ingredients are particularly prone to losing potency over time, so be extra cautious with these items.
Create three distinct zones for your sorted items: keep, donate, and discard. Unopened, non-expired items in good condition can be donated to local food banks. If you’re looking for more ways to declutter your home, this process of careful sorting can be applied to other areas of your living space.
When discarding items, be environmentally conscious. Compost where possible, rinse containers for recycling, and dispose of contaminated items safely. Some municipalities have specific guidelines for food waste disposal, so check local regulations.
Verify you’ve successfully completed this step by confirming:
- All items have been individually checked
- Expired or potentially unsafe items are removed
- Donatable items are separated
- Remaining items are in good condition
- Disposal method is environmentally responsible
This meticulous process ensures your pantry remains a safe, clean, and efficiently organized space for your family’s nutritional needs.
Step 5: Organize items into labeled containers
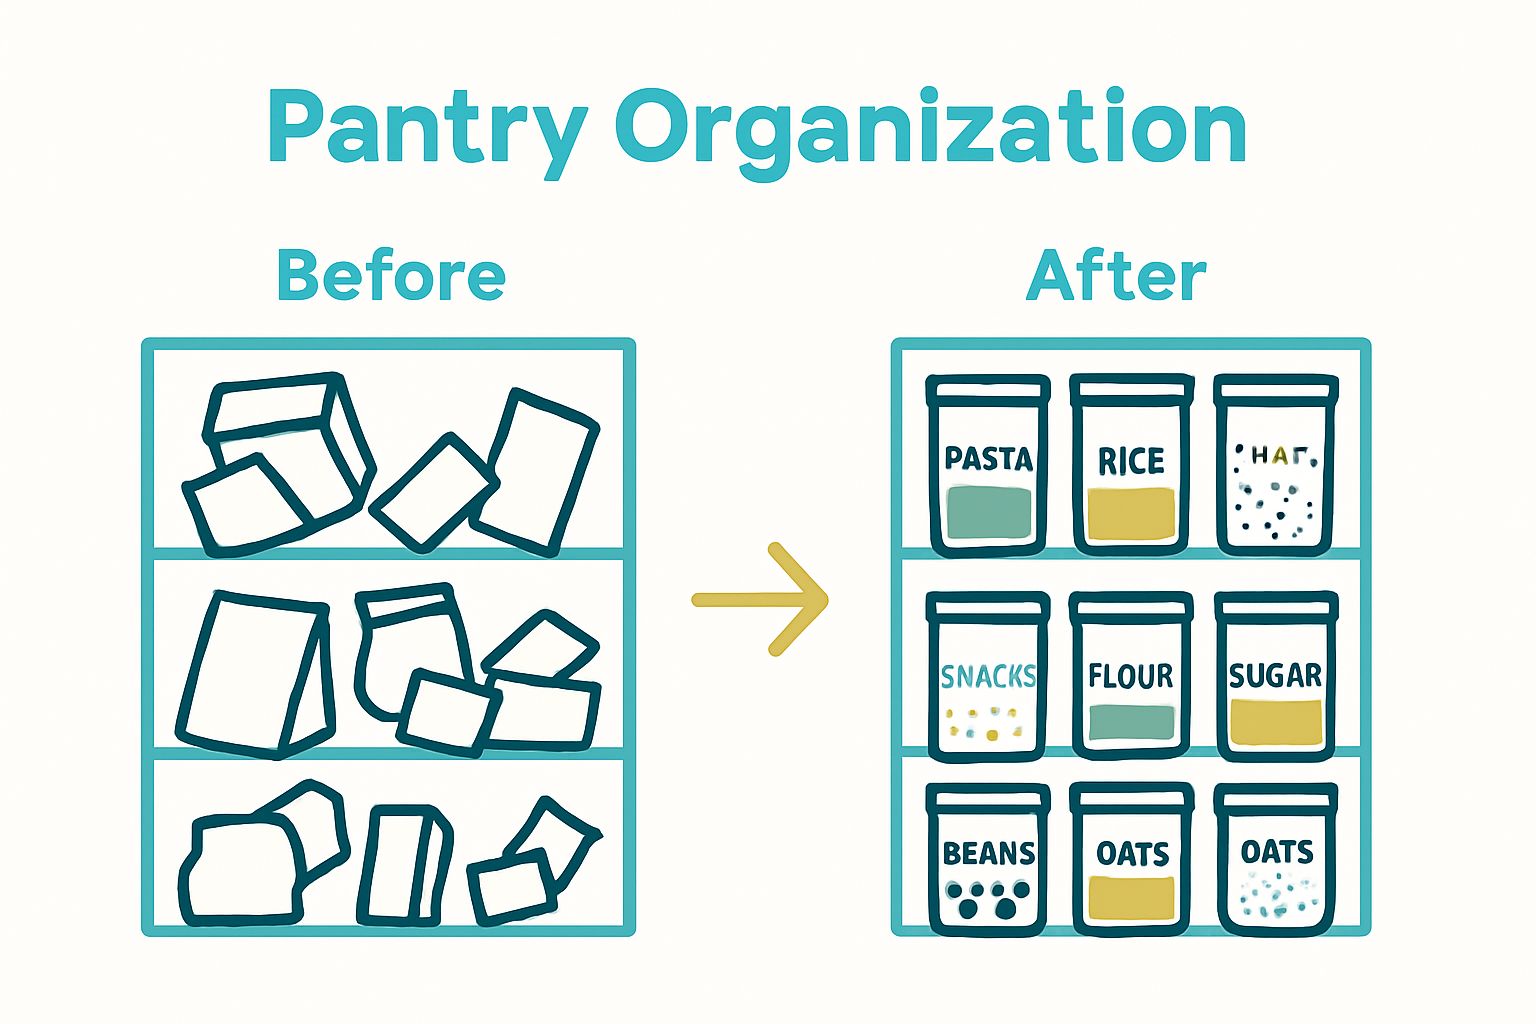
Labeling and containerizing your pantry items transforms a cluttered space into a streamlined, efficient storage system. This step is about creating a visual and functional organization that makes finding ingredients quick and easy, while protecting your food from moisture, pests, and potential contamination.
Choose the right containers for different types of food. Clear, airtight containers work best for dry goods like rice, pasta, and flour. Look for containers with tight-sealing lids that keep moisture and insects out. Glass and high-quality plastic containers with clear sides allow you to see exactly what you have at a glance. Explore our comprehensive guide to kitchen organization essentials for more tips on selecting the perfect storage solutions.
Labeling is more than just a decorative touch – it’s a functional necessity. Use a permanent marker, label maker, or waterproof adhesive labels to clearly mark each container with its contents and the date of transfer or purchase. This helps track freshness and prevents mystery containers from lingering in your pantry. Pro tip: For items like flour and sugar, include the purchase date and a recommended use-by date to help manage your inventory more effectively.
Consider the size and shape of your containers carefully. Rectangular or square containers stack more efficiently than round ones, maximizing your shelf space. Group similar items together – create zones for baking supplies, breakfast items, snacks, and canned goods. This approach makes meal preparation faster and helps you quickly identify when you’re running low on specific ingredients.
Think about accessibility when placing your newly organized containers. Frequently used items should be at eye level or within easy reach. Use shelf risers or stackable containers to create additional vertical storage space. Lighter items can go on higher shelves, while heavier containers should be stored lower to prevent potential accidents.
Verify you’ve successfully organized your containers by confirming:
- All items are in clear, labeled containers
- Containers are airtight and appropriate for their contents
- Items are grouped logically
- Containers are easily accessible
- Labels are clear and include relevant information
This methodical approach transforms your pantry from a chaotic storage space into a functional, easy-to-navigate system that simplifies your daily cooking and shopping routine.
Step 6: Verify organization and maintain regularly
Maintaining your newly organized pantry is just as important as the initial organization process. This final step transforms your hard work into a sustainable system that keeps your kitchen running smoothly. Regular maintenance prevents backsliding into chaos and ensures your pantry remains a functional, efficient space.
Implement a monthly review routine where you spend 15-30 minutes checking your pantry’s status. According to home organization research, consistent maintenance is key to long-term organization success. During these check-ins, rotate older items to the front, check for expired products, and reassess your current storage solutions. This proactive approach prevents food waste and keeps your pantry looking and functioning at its best.
Create a simple tracking system to monitor your inventory. Keep a small whiteboard or digital note where you can quickly jot down items you’re running low on or need to replace. This prevents overbuying and helps you stay organized during grocery shopping. Consider taking a quick photo of your pantry shelves with your smartphone, which can be helpful when you’re at the store and unsure what you actually need.
Develop habits that support ongoing organization. Always return items to their designated containers and labeled spots after use. Teach family members the new system, making it a collective effort. When unpacking groceries, take an extra moment to transfer items into your labeled containers, removing unnecessary packaging that can create clutter. Wipe down containers and shelves during your monthly review to keep everything clean and fresh.
Pay attention to seasonal changes and adjust your pantry organization accordingly.
Holiday baking supplies, summer picnic items, or winter comfort food ingredients might require slight modifications to your storage system. Be flexible and willing to make small tweaks that improve your pantry’s functionality.
Verify you’ve successfully maintained your pantry by confirming:
- Monthly review has been completed
- Expired items have been removed
- Containers are clean and properly labeled
- Inventory tracking system is up to date
- Family members understand the organization system
Remember, a well-organized pantry is an ongoing process. Celebrate your progress and enjoy the peace of mind that comes from knowing exactly what you have and where to find it.
Take Your Pantry Organization Even Further
Organizing your pantry can feel overwhelming, especially when clutter, expired items, and inefficient storage keep piling up. If you related to the struggle of keeping categories clear, making the most of a small space, or maintaining your hard work over time, you are not alone. At Simple Neat Home, we know how important it is to create a kitchen that truly works for your family. When you master sorting by category, labeling containers, and maintaining freshness, you gain peace of mind and save precious time every day.
Ready for your next step? Dive deeper into practical kitchen strategies with our Kitchens Archives for even more ideas on making your cooking spaces functional. For a broader approach, our Organization Archives offers tips beyond the pantry to bring calm to your entire home. Do not wait for clutter to return. Start creating a home where order comes naturally.
Frequently Asked Questions
How can I efficiently empty my pantry for organization?
To efficiently empty your pantry, gather sturdy bins for sorting and make three categories: keep, donate, and discard. Remove every item from the shelves, checking for expiration dates and grouping similar items together to streamline the process.
What cleaning supplies do I need to thoroughly clean my pantry?
Essential cleaning supplies for your pantry include microfiber cloths, all-purpose cleaners, a scrub brush, and protective gloves. Use these to vacuum crumbs, wipe down surfaces, and inspect for any necessary repairs to maintain a hygienic storage area.
What are the best methods for sorting pantry items by category?
Sort your pantry items by creating distinct categories such as baking supplies, canned goods, and snacks. As you categorize, check expiration dates and create separate piles for keeping, donating, and discarding items.
How often should I check expiration dates and discard old items from my pantry?
You should check expiration dates and discard old items from your pantry during your monthly review. Implementing this routine helps maintain health and safety while keeping your pantry organized and efficiently stocked.
What types of containers are best for organizing pantry items?
Clear, airtight containers are best for organizing pantry items like grains, pasta, and snacks, as they prevent moisture and pest contamination. Choose containers that fit well on your shelves, stacking rectangular or square containers to maximize vertical space.
How can I ensure my pantry remains organized after my initial setup?
To maintain your organized pantry, implement a monthly review to rotate items, check for expired products, and update your inventory. Make it a habit to return items to their designated spots immediately after use to prevent clutter from reappearing.
Recommended
- 10 Genius Ways to Organize a Small Pantry | Simple Neat Home
- Kitchen Organization Essentials | Simple Neat Home
- Organization Archives | Simple Neat Home
- How to Create a Pantry – Pantry Organization Tips