Holiday Cookie Swap Essentials: 8 Crowd-Pleasers + Organization Tips
There’s something magical about a cookie swap, isn’t there? You bake one batch, show up with your five dozen cookies, and leave with an incredible variety of homemade treats that would’ve taken you days to create on your own. Plus, you get to spend an evening with friends, swap recipe secrets, and feel like you’ve actually got this holiday thing under control.
But let’s be real: cookie swaps can turn into chaos fast if you’re not careful.
Someone forgets their cookies. Three people bring chocolate chip variations. Nobody can figure out whose container is whose. Your kitchen looks like a packaging supply store exploded. And somehow you end up with eighty cookies at home with zero plan for storing them without your family devouring everything in forty-eight hours.
Sound familiar?
Here’s the thing: cookie swaps are absolutely worth it. They’re one of those holiday traditions that actually brings joy instead of stress—but only if you have a solid plan. This guide gives you everything you need: eight tried-and-true recipes that travel well, plus the organization systems that’ll keep your swap running smoothly instead of descending into beautiful, delicious chaos.
Whether you’re hosting for the first time or you’re a cookie swap veteran, you’ll find realistic strategies here that work for busy families with kitchens that are already packed during the holiday season.
The Cookie Swap Game Plan (Sort This Out First)
The biggest mistake people make with cookie swaps? Not having a clear plan before anyone starts baking. That’s how you end up with confusion about quantities, duplicate recipes, and the dreaded “I thought someone else was bringing containers” scenario.
Let’s avoid all of that.
Get Your Sign-Up System Sorted
If you’re hosting, create a simple digital sign-up sheet. Google Sheets works perfectly because everyone can see what’s been claimed and you’re not playing email tag for three weeks trying to coordinate.
Here’s what you need to track:
✔ Name and contact info (for those inevitable reminder texts)
✔ Cookie variety they’re bringing (prevents six batches of snickerdoodles)
✔ Allergen information (nuts, dairy, gluten—this matters)
✔ Whether they’re bringing packaging or need containers provided
Set clear expectations from the start. Most successful swaps ask for five to six dozen cookies per person—enough for variety without overwhelming home bakers. Specify whether you want traditional baked cookies, bars, or if no-bake options are welcome.
The clearer you are upfront, the fewer panicked texts you’ll get at 9 PM the night before.
Setting Up Your Space
Your cookie swap needs three zones. Nothing fancy—just intentional organization that keeps things flowing smoothly.
Drop-Off Station (near the entrance): This is where people put their cookies when they arrive. Set out labeled spots for each person—index cards work great. This prevents the pile-up where nobody can tell whose gorgeous gingerbread cookies belong to whom.
Tasting Station (center of the action): Include small plates, napkins, and ingredient cards so people can sample before committing to take home three dozen of something. Nobody wants to discover after the fact that those beautiful cookies contain ingredients they can’t eat.
Packing Station (easy access): Boxes, bags, tissue paper, ribbon, tape, scissors—everything within arm’s reach. When your kitchen stays organized, your event space should follow the same principle.
Easier said than done, I know. But even these basic zones make a huge difference.

The Container Problem (Let’s Actually Solve It)
Let’s talk about the thing nobody mentions until it’s too late: containers that never make it home.
You know exactly what I’m talking about. You bring your nice glass storage containers, someone accidentally takes them home, and six months later you’re still wondering where they went. We’ve all lived this.
Here’s how to avoid the container drama:
Option 1: Disposable Everything
Require everyone to bring cookies in packaging they don’t need back. Disposable containers from the dollar store, bakery boxes, even sturdy paper plates wrapped in cellophane. Easy, no guilt about taking someone’s stuff, no awkward container reunions.
Option 2: You Provide Uniform Containers
Buy simple clear containers in bulk—seriously, the dollar store is your friend. Everyone goes home with identical containers. They stack beautifully, you’re not tracking ownership, and people can actually see what they’re taking.
Option 3: Label Like Your Life Depends On It
If you’re using your own containers and absolutely want them back, label the bottom with permanent marker BEFORE the party starts. Write your full name clearly. After some wine and holiday cheer, container ownership becomes surprisingly contentious.
Pro tip: Whatever system you choose, communicate it when people sign up. “Please bring cookies in disposable packaging” or “I’ll provide all containers” prevents so many headaches later.
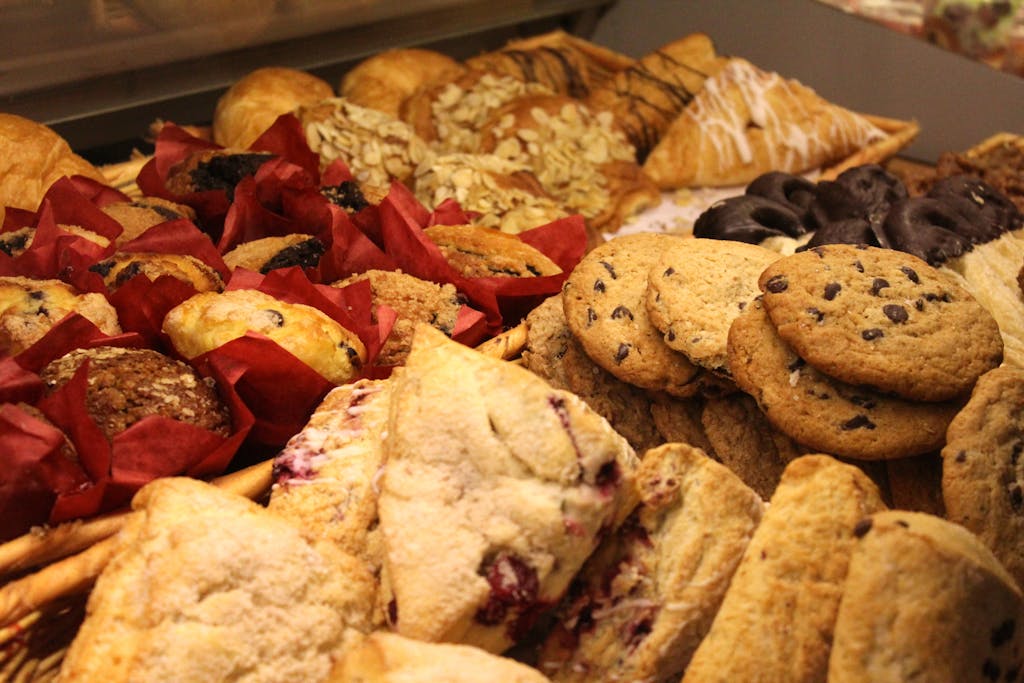
8 Cookies That’ll Disappear First at Your Swap
Alright, let’s get to the good stuff. These aren’t complicated show-off recipes that require special equipment or culinary school training. They’re the cookies that disappear first at every swap—the ones people ask for the recipe for year after year.
They travel well, they store beautifully, and most importantly? They’re achievable on a Wednesday night when you’re already exhausted from everything else on your holiday to-do list.
Each recipe makes five to six dozen cookies—perfect swap quantities.
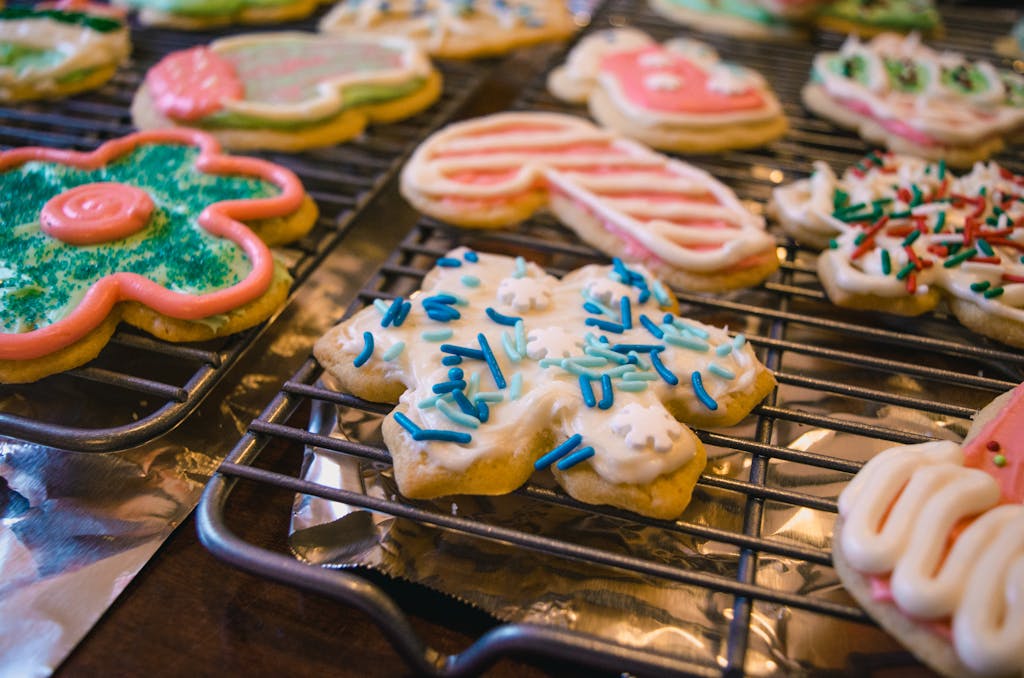
Classic Sugar Cookies with Royal Icing
Sugar cookies are the MVP of cookie swaps. Everyone loves them, they’re endlessly customizable, and honestly? They actually get better after sitting for a day or two as the flavors develop.
These hold their shape beautifully (no weird spreading blobs), and the royal icing creates that bakery-perfect look without requiring professional decorating skills.
The dough is simple: Butter, sugar, eggs, vanilla, flour, baking powder, salt. Mix it up, roll it out to about quarter-inch thickness, and cut with your favorite seasonal shapes.
The royal icing: Powdered sugar, meringue powder, and water. That’s it. It hardens to a smooth finish that won’t smudge during transport.
Make-ahead strategy: Make the dough two days ahead and keep it wrapped tightly in the fridge. Rested dough rolls more easily and produces better cookies. Bake them the day before your swap, let them cool completely, then ice them that evening. They’ll be perfectly set by party time.
Trust me on the resting—the texture is noticeably better and you’re not fighting sticky dough at 10 PM.
Brown Butter Chocolate Chip Cookies
When you want to elevate a classic beyond recognition, brown butter is your secret weapon. The nutty, caramel-like flavor transforms ordinary chocolate chip cookies into something people request year after year.
These have that perfect crispy edge with a chewy center that makes them dangerously addictive.
Here’s what makes them special: Brown your butter until it’s golden and smells like toasted hazelnuts—this step alone elevates everything. Mix with both white and brown sugar, add eggs and vanilla, then fold in flour, baking soda, salt, and high-quality chocolate chips.
The trick: The brown butter crystallizes when it cools, so you need to bring it back to room temperature before mixing. Patience pays off here.
Storage tip: These freeze beautifully BEFORE baking. Scoop them onto baking sheets, freeze solid, then transfer to freezer bags. Bake them fresh the morning of your swap for maximum impact. The smell alone will make your kitchen incredible.
Use a cookie scoop for uniform portions—they’ll bake evenly and look professional without extra effort.
Peppermint Bark Cookies
These capture everything beloved about peppermint bark in cookie form. Chocolate base, white chocolate drizzle, crushed candy canes on top. They look stunning with minimal effort, which is exactly what we need during the holidays.
The base: Chocolate cookie dough with cocoa powder and melted chocolate, butter, sugar, eggs, flour, and baking powder. Standard stuff, nothing scary.
The magic: After baking and cooling, swirl melted white chocolate over each cookie and immediately sprinkle with crushed peppermint candies. The candy presses gently into the white chocolate as it sets, creating both flavor and gorgeous texture.
Candy crushing tip: Put candy canes in a sealed plastic bag and crush with a rolling pin. You want varied sizes from fine dust to small chunks—the different sizes catch light beautifully and create interesting texture. Don’t use a food processor unless you want peppermint powder everywhere.
These look incredibly festive and they’re remarkably forgiving for newer bakers. Win-win.
Gingerbread Spice Cookies
Rich molasses, warm spices, and that cozy gingerbread flavor that just screams holidays. These are soft rather than crispy—the kind you can’t stop eating even though you meant to save room for other varieties.
The smell alone makes your entire house smell like Christmas incarnate.
The dough: Molasses, brown sugar, butter, eggs, flour, ginger, cinnamon, cloves, and baking soda. It needs to chill for at least two hours, which makes this perfect for spreading prep across multiple days.
The finish: Roll each ball in granulated sugar before baking for sparkly tops and subtle crunch that contrasts beautifully with the soft interior.
The secret: These actually improve over time as the spices meld and develop. Bake them three or four days before your swap for optimal flavor. Store in an airtight container with a piece of bread to maintain perfect softness—replace the bread slice daily.
Yes, the bread trick really works. It releases just enough moisture to keep cookies tender without making them soggy.
Lemon Crinkle Cookies
Bright, citrusy lemon provides a refreshing contrast to all the chocolate-heavy cookies that dominate most swaps. The powdered sugar coating creates those beautiful crackled patterns that look like snow, making them as pretty as they are delicious.
The process: Cream butter and sugar, add eggs and fresh lemon juice, then mix in flour, baking powder, and lots of lemon zest. Form into balls, roll generously in powdered sugar, and bake until they crack dramatically.
Why fresh matters: Use fresh lemon juice and zest rather than extracts. The flavor is incomparably better—brighter, more vibrant, actually tastes like real lemons instead of lemon-flavored something.
Spacing is crucial: These spread more than you’d expect, so give them at least two inches of space on your baking sheet. Crowded cookies merge into lemon blobs instead of staying individual.
They’re best the day of baking but hold well for three to four days in proper storage. The crinkled tops smooth out slightly over time but the flavor stays excellent.
Salted Caramel Pretzel Cookies
Sweet-and-salty combinations rule modern baking, and these deliver that perfect balance. Chunks of pretzels provide salty crunch, caramel chips create pockets of gooey sweetness, and a sprinkle of flaky sea salt on top brings everything together.
The base: Standard chocolate chip cookie dough—butter, sugars, eggs, vanilla, flour, baking soda, salt. Nothing complicated.
The twist: Fold in caramel chips and coarsely chopped pretzels. After scooping onto baking sheets, press additional pretzel pieces onto the tops and sprinkle with flaky sea salt. This ensures every bite has that sweet-salty-crunchy combination.
Baking tip: Slightly underbake these to maintain that perfect chewy texture. They’ll continue firming up as they cool on the baking sheet. The combination of soft cookie, melty caramel, crunchy pretzel, and salt crystals creates something special in every bite.
These are basically impossible to stop eating. Consider yourself warned.
Shortbread Cookies Three Ways
Classic shortbread offers incredible versatility. Make one master dough, divide it three ways, and create three distinct varieties. It streamlines your prep while showcasing range.
The butter-forward flavor makes shortbread universally beloved—plus it’s naturally gluten-free if you use the right flour blend.
The base dough: Butter, powdered sugar, flour, pinch of salt. Literally four ingredients. Mix until it comes together.
Three variations:
- Classic: Leave one-third plain, cut into traditional rectangles
- Chocolate: Mix cocoa powder into the second third
- Rosemary: Add finely chopped fresh rosemary to the final third for elegant savory-sweet cookies
Make-ahead magic: Shortbread dough freezes exceptionally well. Shape into logs, wrap tightly, freeze for up to three months. Slice and bake directly from frozen, adding just two minutes to baking time. The uniform slices ensure even baking and professional presentation without stress.
This is the ultimate efficient cookie when you’re short on time but want variety.
Cranberry White Chocolate Oatmeal Cookies
These substantial cookies combine hearty oatmeal with tart dried cranberries and creamy white chocolate chips. They’re satisfying without being too rich, and the texture combination—chewy oats, soft cranberries, melty chocolate—creates interest in every bite.
The mix: Cream butter with brown sugar, add eggs and vanilla, then fold in flour, baking soda, cinnamon, salt, oats, dried cranberries, and white chocolate chips.
Oat choice matters: Use old-fashioned rolled oats, not quick-cooking. They provide better texture and hold up during storage without getting mushy.
Storage bonus: These maintain quality longer than most cookies because the oats retain moisture naturally. They’re actually better on day two when the cranberries have softened slightly and flavors have melded. Store in airtight containers with a slice of apple to keep them perfectly soft for up to a week.
Perfect for people who want something substantial that isn’t pure sugar and chocolate.
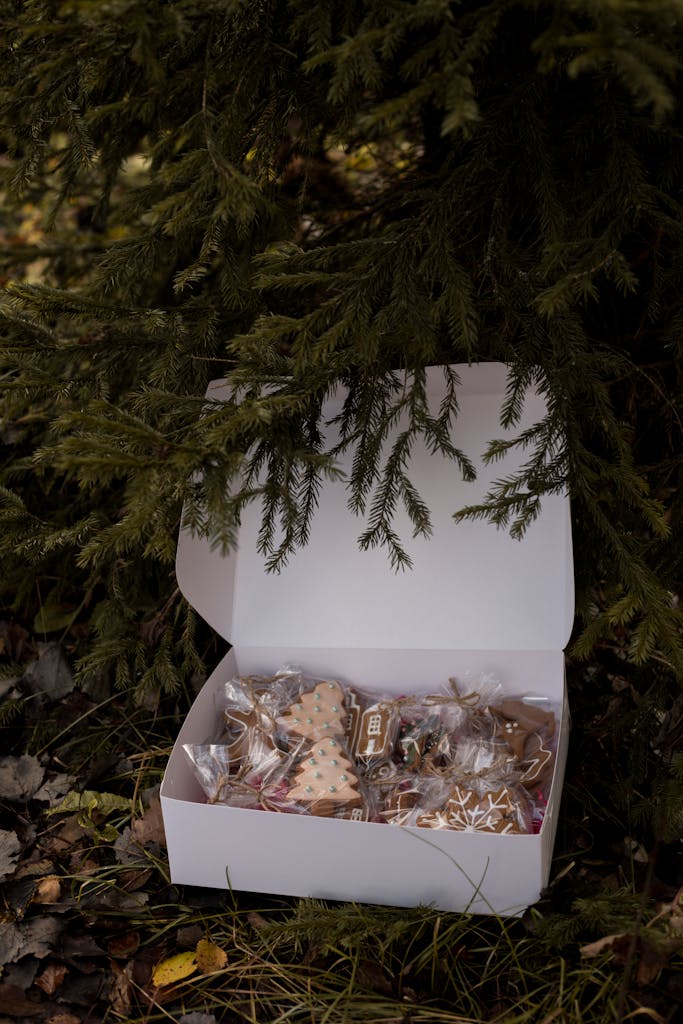
Packaging That Actually Looks Good (Without Spending a Fortune)
The presentation of your cookies matters—not because you need Pinterest perfection, but because thoughtful packaging protects your hard work during transport and makes the moment people open their treats feel special.
You don’t need expensive materials. Just attention to a few key details.
Smart Packaging by Cookie Type
Different cookies need different packaging strategies. Let’s be practical about this.
Delicate cut-out cookies (like decorated sugar cookies): These need cushioning between layers. Place wax paper or parchment between layers, pack in sturdy boxes with minimal movement. Those rectangular plastic containers with secure lids from the dollar store work beautifully and stack easily.
Sturdier cookies (like chocolate chip, oatmeal, gingerbread): These can handle more jostling. Clear cellophane bags tied with ribbon create elegant presentation at minimal cost. Drop cookies and bars travel well this way.
Bar cookies: Cut into uniform squares, stack neatly, separate layers with parchment paper. These pack efficiently and look polished even in simple packaging.
Pro tip: Repurpose clean boxes from your kitchen decluttering sessions. Crackers, cookies, and tea often come in perfect-sized boxes. Remove labels, line with tissue paper, and you’ve got free, sturdy packaging.
Simple Touches That Elevate Everything
You don’t need to be crafty to make your packaging look special. A few consistent elements create cohesive, gift-worthy presentation.
✔ Print simple labels with cookie names and ingredient lists
✔ Choose one or two colors for all your packaging elements
✔ Use ribbon you already have rather than buying new
✔ Stack with prettiest cookies visible on top
✔ Place any broken cookies on bottom (still delicious, just hidden)
First impressions matter. That initial glimpse when someone opens the container sets expectations for everything inside.
The Assembly Line That Saves Your Sanity
When you’re packaging five or six dozen cookies, efficiency matters tremendously. Don’t complete one container at a time—you’ll be there forever.
Set up your station: Get all supplies within reach—containers, bags, ribbon, labels, tape, scissors, cookies (obviously).
Work in stages:
- Prepare all containers or bags
- Fill everything
- Add labels to everything
- Tie ribbons or seal everything closed
This assembly-line approach is dramatically faster than you’d expect and ensures consistency across all packages. Your organized kitchen habits translate beautifully to packaging tasks.
Label the bottoms of containers you want returned with permanent marker BEFORE filling. This simple step prevents confusion later when everyone’s trying to figure out whose stuff is whose.

Storage Strategies (Because You’ll Have So Many Cookies)
Even with perfect planning, cookie swaps generate more treats than any household can reasonably consume immediately. Proper storage ensures your variety stays fresh and delicious rather than turning stale or disappearing into the void of your pantry.
Let’s talk realistic storage solutions.
Room Temperature Storage (For the Next Few Days)
Most cookies keep perfectly at room temperature if they’ll be eaten within a week. Use airtight containers with secure lids—one cookie variety per container. Mixing varieties causes flavor transfer and some cookies absorb moisture from others, compromising texture.
Soft cookie trick: Place a piece of bread in containers with soft cookies like gingerbread or oatmeal varieties. The bread releases moisture that keeps cookies tender without making them soggy. Replace the bread slice every few days.
Crisp cookie trick: Add a sugar cube to containers with crisp cookies like shortbread. It absorbs any excess moisture that would make them soft.
Smart stacking: Use clear rectangular containers so you can see what’s inside without opening everything. They stack more stably than round containers too. This aligns perfectly with organizing your pantry for maximum efficiency.
Freezing for Extended Freshness
Most cookies freeze beautifully for up to three months. This solves the cookie overload problem—you don’t have to eat everything immediately just because it’s there.
The process:
✔ Let cookies cool completely first
✔ Layer between sheets of wax paper or parchment
✔ Store in freezer-safe containers or heavy-duty freezer bags
✔ Remove as much air as possible (prevents freezer burn)
✔ Label with cookie variety AND date
Thawing properly: Leave frozen cookies in their sealed containers at room temperature. This prevents condensation from forming directly on the cookies, which makes them soggy. Most cookies thaw completely within an hour or two.
Future-you will appreciate knowing exactly what’s in each container without playing the guessing game at 9 PM when you need dessert.
Creating a Rotation System
When you have fifteen varieties from a cookie swap, you need a system for managing the abundance. Otherwise it’s just chaos in your pantry for weeks.
The current rotation: Designate one easily accessible container with a small selection from various types. Refill from backup storage as needed. This keeps variety available without overwhelming your everyday kitchen space.
Bulk storage: Keep the majority of your cookies in less accessible space—basement fridge, chest freezer, high pantry shelf. This removes the temptation to devour everything while ensuring treats stay fresh for later enjoyment.
Family communication: Label your rotation container so everyone knows which cookies are fair game. This prevents arguments and helps you track what’s disappearing fastest.
You might discover your family’s favorites are different than you expected. Valuable information for next year’s baking.
Handling Dietary Restrictions (Without Making It Weird)
Modern cookie swaps need to accommodate various dietary needs without making anyone feel excluded or requiring separate everything. Smart planning allows everyone to participate safely while maintaining the generosity that makes cookie swaps special.
The key is treating accommodations as integral to planning rather than afterthoughts.
Clear Labeling That Actually Works
Require everyone to label their cookies with common allergens: nuts, dairy, eggs, gluten, soy. Create simple checkbox labels people can fill out rather than asking them to write full ingredient lists.
This works more reliably than expecting bakers to remember every component, especially for recipes they’ve made for years without thinking about it.
Separate serving areas: If several participants have severe allergies, designate different colored plates or serving trays for allergen-free options. Visual systems work better than relying on people to read labels when they’re chatting and socializing.
Personal containers: Ask anyone with severe allergies to bring their own container that never touches other surfaces. This protects them from cross-contamination during the exchange. It’s a small accommodation that allows everyone to participate without anxiety.
Making It Inclusive Without Stress
Encourage participants to bring at least one recipe that accommodates common restrictions. Gluten-free cookies, dairy-free treats, nut-free options ensure everyone gets variety rather than taking home only two things they can safely eat.
Many traditional cookies adapt easily without sacrificing quality. Shortbread becomes naturally gluten-free using almond flour. Chocolate cookies work beautifully with coconut oil replacing butter. These modifications often create results indistinguishable from traditional versions.
Prevent cross-contamination: Stock your tasting station with disposable serving utensils—one per cookie variety. This shows consideration for all participants without making it feel overly complicated.
Managing the Conversation
Create an atmosphere where people feel comfortable discussing needs without embarrassment. Some bakers get defensive about modifications or special requests. Set the tone early that accommodations enhance your event rather than complicate it.
If someone can’t participate due to severe restrictions that make swapping unsafe, consider alternative involvement. They might contribute packaging supplies, napkins, or decorations instead. Including them somehow maintains community spirit even when full participation isn’t possible.
Document what worked well for future reference. Those amazing gluten-free sugar cookies everyone loved? Make note of who brought them. That texture-challenged oat flour experiment? Remember to suggest different substitutions next time.
After the Swap: Quick Organization Tips
The event’s over, but taking fifteen minutes now prevents chaos in your kitchen for the next two weeks. Smart cleanup positions you perfectly for enjoying your cookie bounty.
Immediate Kitchen Reset
Start while everything’s fresh in your mind. Return serving dishes and utensils to proper homes before addressing packaging materials. This prevents the dreaded counter pile-up that makes preparing any meal feel impossible.
✔ Sort remaining supplies immediately
✔ Return unused ribbon to gift wrap storage
✔ Put extra containers back in their home
✔ Consolidate opened packages (multiple partial bags of sprinkles into one labeled container)
Your regular kitchen organization habits make this quick rather than overwhelming.
Organize Your Cookie Haul
Sort by storage method: room temperature, refrigerated, frozen. Complete all freezing immediately while you’re in organization mode. “I’ll do it later” usually means cookies get forgotten or freezer-burned.
Create a simple inventory on your phone. When you’re staring into your pantry three weeks later trying to remember if you still have those gingerbread cookies, you’ll appreciate having notes.
Set up a cookie station in your pantry if space allows. One designated area keeps everything organized and prevents the spread that happens when treats wind up scattered everywhere.
Planning for Next Year
Document lessons learned while details are fresh. What worked? What would you change? Which recipes got rave reviews? What organizational strategies fell flat?
Take photos of your setup—table arrangement, signage, station organization. Visual references prove invaluable next year when you can’t quite remember how you arranged everything.
Update your recipe list with any new additions worth trying. That bourbon-pecan shortbread someone brought? Note it. Those failed lemon bars you attempted? Remember the recipe source so you avoid it next time.
Your Blueprint for Cookie Swap Success
Here’s what you need to remember: cookie swaps don’t have to be complicated. They really don’t.
The chaos, the confusion, the “why did I volunteer to organize this” panic? That comes from winging it without a plan and hoping everything magically comes together.
But you’ve got the plan now. Eight solid recipes that actually work. Organization systems that prevent common problems. A realistic timeline that doesn’t require superhuman energy. Storage strategies that protect your hard-won cookie variety.
Most importantly, you’ve got permission to let go of perfection.
If your royal icing isn’t Instagram-perfect? Nobody cares—they’re too busy enjoying the cookies. If someone forgets to bring theirs? You’ve got a backup plan. If the exchange runs thirty minutes long because everyone’s having too much fun talking? That’s actually the point.
The whole purpose isn’t executing a flawless event. It’s gathering people around shared appreciation for homemade treats and creating a moment of connection during the busy holiday season.
Everything else—the perfect decorations, the coordinated packaging, the elaborate display—that’s all just extra. Nice if it happens, but not the point.
What people will remember isn’t whether your gingerbread cookies were exactly the same size. They’ll remember the laughter, the recipe swaps, the discovery of a new favorite cookie. They’ll remember that you created space for community and celebration.
And thanks to your planning and organization? You’ll actually be present for those moments instead of stressed about logistics.
So take a breath. You’ve got this.
The work you do preparing—the sign-up sheet, the space setup, the container solution, the packaging station—that’s not just about cookies. It’s about removing stress so you can enjoy your own event. It’s about creating the calm foundation that lets magic happen.
And next year? You’ll have this guide bookmarked, your systems tested, and you’ll feel even more confident doing it all again.
Now go create that delicious, organized, joy-filled cookie swap you deserve.