The Organized Thanksgiving: Traditional Dishes + Make-Ahead Timeline
Let’s be real: Thanksgiving is wonderful in theory – gathering loved ones, sharing gratitude, enjoying a beautiful meal together. But the reality? It can feel like a chaotic juggling act of oven space, refrigerator Tetris, and trying to get everything hot at the same time while your mother-in-law asks if she can “help” and the kids are melting down because dinner’s running late.
Sound familiar?
Here’s the thing: the chaos isn’t because you’re doing it wrong. It’s because Thanksgiving is genuinely complicated. You’re essentially running a small restaurant for a day, except your kitchen probably isn’t designed for it, and you’re doing it all yourself (or close to it).
But what if I told you the secret to a stress-free Thanksgiving isn’t fancy recipes, a huge kitchen, or even extra help? It’s having a solid plan and actually sticking to it.
This guide gives you both traditional, crowd-pleasing recipes AND a realistic organization system to make Thanksgiving actually enjoyable – not just survivable. We’re talking about proper refrigerator organization, a detailed make-ahead timeline, and even a game plan for those leftovers that’ll be taking over your fridge by Friday.
Ready to have your most organized Thanksgiving yet? Let’s do this.
The Game Plan: Your Make-Ahead Timeline
The biggest mistake people make with Thanksgiving? Trying to do everything on Thursday. That’s a recipe for stress, not success.
The real secret is spreading the work across several days. And I’m not talking about overwhelming yourself with tasks – just strategic planning that makes the actual day feel easy.
Here’s your complete timeline:
Two Weeks Before Thanksgiving
This is when you set yourself up for success without feeling rushed.
What to do:
- Review your recipes and create a master shopping list
- Declutter your kitchen cupboards to make space for ingredients
- Check your pantry for staples (flour, sugar, spices, baking powder)
- Inventory your storage containers and serving dishes
- Order your turkey if you haven’t already
Why this matters: You don’t want to discover on Wednesday that you’re out of brown sugar or that your roasting pan has mysteriously disappeared. Trust me on this one.
One Week Before Thanksgiving
Time to tackle the big organizational tasks.
What to do:
- Give your refrigerator a proper decluttering session
- Remove unnecessary condiments, expired items, and anything that can wait until next week
- Shop for non-perishable ingredients
- Stock up on aluminum foil, plastic wrap, and containers
- Clean out your freezer to make room for make-ahead items
The refrigerator purge is crucial. That bottle of salad dressing from six months ago? It can go. Those takeout containers in the back? Time to let them go. You need every inch of space.
2-3 Days Before Thanksgiving (Monday-Tuesday)
This is your main grocery shopping window.
What to do:
- Pick up your turkey (if not already delivered)
- Buy all fresh ingredients: vegetables, dairy, bread
- Purchase wine, beverages, and any forgotten items
- Start organizing your refrigerator with dedicated zones (more on this below)
- Make your cranberry sauce (it actually gets better sitting in the fridge!)
One Day Before Thanksgiving (Wednesday)
Your first major cooking day – but nothing too intense yet.
What to do:
- Dry out bread for stuffing (leave it uncovered on counter)
- Prep vegetables: peel potatoes and store in water, trim green beans
- Make pie(s) and store covered in refrigerator
- Mix herb butter for turkey and refrigerate
- Prep gravy base if making ahead
- Set up your serving station and table
Time commitment: About 2-3 hours of actual work. This doesn’t have to take all day.
One Day Before Thanksgiving (Wednesday Evening)
This is your power prep session.
What to do:
- Make mashed potatoes completely (yes, you can!)
- Assemble stuffing in baking dish, cover, and refrigerate
- Assemble green bean casserole (don’t add topping yet)
- Start turkey thawing if you haven’t already (it should already be thawing!)
- Triple-check your timeline for Thursday
Thanksgiving Morning
You’ve done most of the work. Now you just execute the plan.
What to do:
- Get turkey in oven at the right time
- Set out butter and dairy to come to room temperature
- Prep any last-minute vegetables
- Set the table if not done already
- Take a shower and actually get ready (you’ve earned it!)
The beauty of this timeline? You’re never working more than a few hours at once, and by Thanksgiving Day, you’re just reheating and finishing dishes. No panic, no stress.
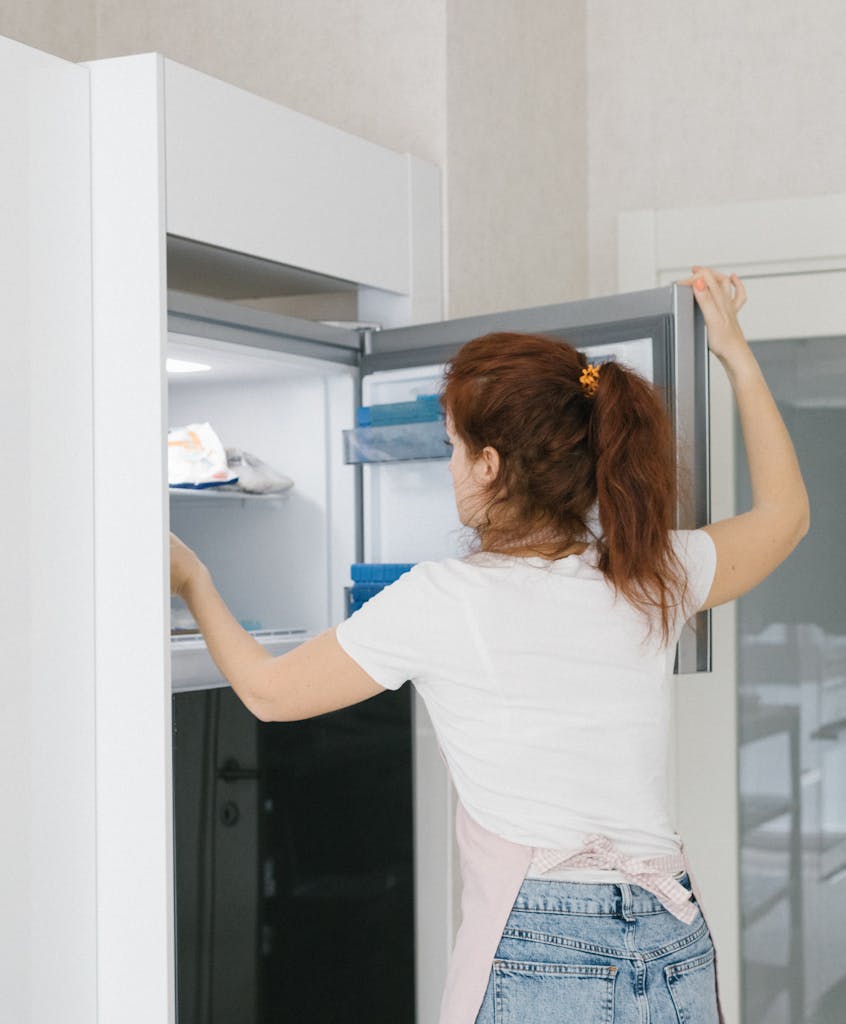
Refrigerator Organization for Thanksgiving Week
Okay, let’s talk about the kitchen organization that’s going to make or break your Thanksgiving week: your refrigerator.
If you’ve ever played Tetris with a turkey, a casserole dish, three types of pie, and a bowl of mashed potatoes, you know this is serious business.
The Pre-Thanksgiving Fridge Purge
Before you can organize, you need space. Real space, not just shuffling things around.
Take 15 minutes (I’m timing you) and do this:
✔ Remove all condiments you don’t absolutely need this week
That fancy mustard from last month’s dinner party? Move it to a cooler or secondary fridge if you have one. If you don’t use it weekly, it doesn’t earn prime real estate right now.
✔ Check expiration dates ruthlessly
That yogurt from two weeks ago? Gone. The leftover Chinese food from Sunday? You’re not eating it. Be honest with yourself.
✔ Relocate all beverages
This is huge. Get drinks out of your main fridge. Use a cooler on the porch, store them in the garage, put them in a secondary fridge if you have one. Beverages take up an insane amount of space for something that just needs to be cold.
✔ Clear out the crisper drawers
Empty them completely. These are prime storage zones for your Thanksgiving vegetables, and they need to be empty and clean.
✔ Remove anything that doesn’t need refrigeration
Some vegetables (like potatoes and onions) actually prefer cool, dark storage anyway. Clear them out.
After this purge, you should have at least 50% more usable space. If you don’t, keep going.

Strategic Storage Zones
Now let’s organize what’s left and what’s coming in. Your refrigerator needs to work like a well-oiled machine this week.
Top Shelf: Make-Ahead Dishes
This is where your finished, covered dishes live. They’re ready to go, just need reheating.
- Pumpkin pie (covered loosely with foil)
- Cranberry sauce (in jar or covered bowl)
- Herb butter (in covered container)
- Any other completed items
Why the top shelf? It’s typically the most consistent temperature, and you won’t be digging through these constantly.
Middle Shelves: Active Prep Ingredients
This is your workspace. Items you’ll be reaching for constantly.
- Prepped vegetables in clear containers
- Turkey while it thaws (on a rimmed pan!)
- Dairy products you’ll need (butter, cream, milk)
- Cheese and appetizer items
Use clear, stackable containers wherever possible. Label them if you’re meal prepping multiple dishes. Trust me, future-you won’t remember if that bowl is for the stuffing or the green bean casserole.
Bottom Shelf: The Turkey Zone
Your turkey gets the bottom shelf, and here’s why: if it leaks (and it might), you don’t want turkey juice dripping onto your finished pumpkin pie. That’s a Thanksgiving horror story nobody wants.
- Place turkey in a rimmed baking sheet or large pan
- Keep it in original packaging until you’re ready to prep
- Give it its own dedicated space – don’t try to squeeze other items around it
Crisper Drawers: Vegetables Waiting Their Turn
This is where your not-yet-prepped vegetables live.
- Carrots, celery, fresh herbs
- Green beans before they’re trimmed
- Any salad ingredients
- Garnishes and fresh items
Keep vegetables in their original bags or produce bags to maintain humidity.
Door Shelves: Frequently Accessed Items
The door is the warmest part of your fridge, so use it wisely.
- Butter (it’s fine here for a few days)
- Milk for coffee/breakfast
- Any condiments you actually need
- Eggs if you’re using them for other meals

Smart Container Strategy
Let’s talk containers, because organizing your kitchen means having the right tools.
What you need:
✔ Clear stackable containers in multiple sizes
Glass is ideal (microwave-safe for reheating), but plastic works too. The key is being able to see what’s inside without opening it.
✔ Large rimmed baking sheets
These are miracle workers for storing flat items or catching drips. Stack prepped items on them.
✔ Plastic wrap and aluminum foil
For covering large bowls and dishes that don’t have lids.
✔ Painter’s tape and a Sharpie
Label everything with what it is and when you made it. “Mashed potatoes – Weds” saves you from playing the guessing game later.
Pro tip: Can’t fit everything? Use coolers on your porch or in your garage as overflow “fridges” for drinks and items that just need to stay cold but aren’t perishable proteins. This works great for keeping beverages, extra vegetables, or even your finished cranberry sauce cold if you’re really tight on space.
The Visual Layout
Imagine looking into your refrigerator the day before Thanksgiving. Here’s what you should see:
- Top shelf: Covered pies and finished items, neatly arranged
- Middle shelves: Clear containers with prepped ingredients, labeled
- Bottom shelf: Turkey in its designated spot, nothing else competing for space
- Drawers: Vegetables organized by when you’ll use them
- Door: Only essentials you’ll grab frequently
It should look intentional. Organized. Dare I say, even a little bit beautiful?
This organization isn’t about being Type A or Instagram-perfect. It’s about reducing stress and making sure you can actually find what you need when you need it.
Traditional Thanksgiving Recipes with Prep Notes
Alright, let’s get to the food. These are traditional, no-fuss recipes that your family will love – with detailed make-ahead instructions so you’re not scrambling on Thursday.
Every recipe includes exactly when to prep, how to store, and how to reheat. Because that’s where the magic happens.
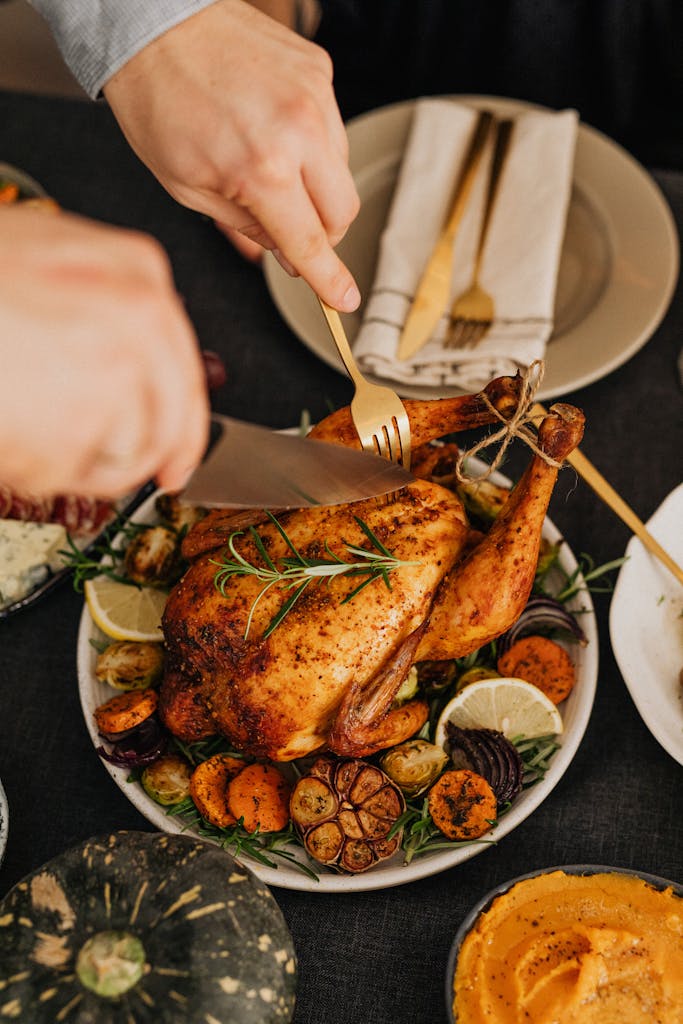
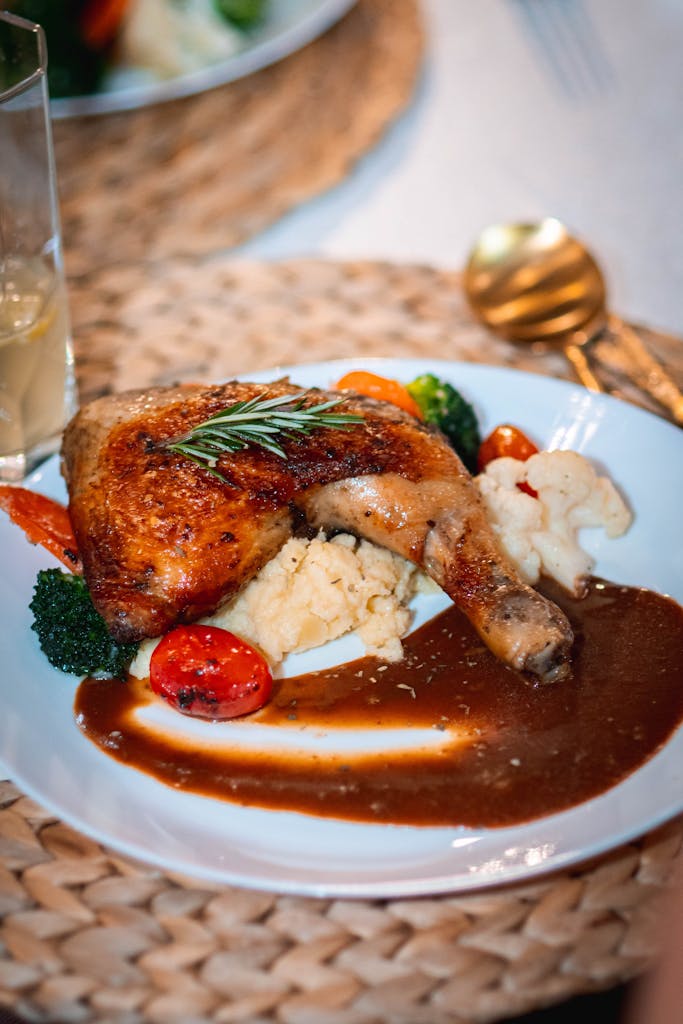
Classic Roast Turkey
The star of the show doesn’t have to be stressful.
Serves: 10-12
Prep time: 20 minutes
Cook time: 3-4 hours (depending on size)
Ingredients:
- 1 whole turkey (12-14 pounds)
- ½ cup butter, softened
- 2 tablespoons fresh rosemary, chopped
- 2 tablespoons fresh thyme, chopped
- 2 tablespoons fresh sage, chopped
- 4 cloves garlic, minced
- Salt and black pepper
- 2 cups chicken stock
- 1 onion, quartered
- 1 lemon, halved
- Fresh herbs for cavity
Instructions:
- Make the herb butter: Mix softened butter with herbs, garlic, salt, and pepper. This is what’s going to make your turkey incredibly flavorful.
- Prep the turkey: Remove giblets and neck (save for gravy!). Pat turkey completely dry with paper towels – this is crucial for crispy skin.
- Season generously: Carefully loosen skin over breast and thighs. Spread half the herb butter directly on the meat under the skin. Rub remaining butter all over the outside. Season inside cavity and outside with salt and pepper.
- Stuff the cavity: Add onion, lemon, and fresh herbs to cavity. These add moisture and flavor but aren’t traditional stuffing (that goes in a separate dish for food safety).
- Roast: Place turkey breast-side up in roasting pan. Pour stock into bottom of pan. Roast at 325°F, basting every 45 minutes. Turkey is done when thigh reaches 165°F internal temperature (use a meat thermometer – it’s your best friend).
- Rest: This is non-negotiable. Let turkey rest 30 minutes before carving. It’ll be juicier, I promise.
Make-Ahead Timeline:
✔ 3 days before: Make herb butter, store covered in refrigerator
✔ Monday (if frozen): Move turkey to refrigerator to begin thawing
✔ Wednesday evening: Remove giblets, pat dry, let turkey air-dry uncovered in fridge overnight for crispier skin
✔ Thursday morning: Apply herb butter, season, and roast according to timeline (calculate 15 minutes per pound)
Storage Tips: Turkey needs to thaw in the refrigerator on the bottom shelf in a rimmed baking sheet. Never thaw on the counter. Plan 24 hours of thawing time for every 4-5 pounds.
Reheating: You’re making this fresh on Thursday, so no reheating needed. But for leftovers, slice turkey and reheat covered in gravy at 325°F for 20-25 minutes.
Traditional Herb Stuffing
This is everyone’s favorite side dish. It’s also the easiest to make ahead.
Serves: 10-12
Prep time: 20 minutes
Cook time: 40 minutes
Ingredients:
- 1 loaf (16 oz) day-old bread, cubed
- ½ cup butter
- 2 cups onion, diced
- 2 cups celery, diced
- 3 cloves garlic, minced
- 2 tablespoons fresh sage, chopped
- 2 tablespoons fresh thyme, chopped
- 1 tablespoon fresh rosemary, chopped
- 3 cups chicken stock
- 2 eggs, beaten
- Salt and pepper to taste
- Fresh parsley for garnish
Instructions:
- Dry out the bread: Spread bread cubes on baking sheets and leave out overnight OR bake at 250°F for 30 minutes until dry. You want them crunchy, not fresh.
- Sauté vegetables: Melt butter in large skillet over medium heat. Add onion and celery, cook until soft (about 10 minutes). Add garlic and herbs, cook 1 minute more.
- Combine everything: In large bowl, toss dried bread with vegetable mixture. Add stock gradually (you might not need all of it – stuffing should be moist but not soggy). Stir in beaten eggs. Season well with salt and pepper.
- Transfer to baking dish: Spread into greased 9×13-inch baking dish. Cover with foil.
- Bake: Bake covered at 350°F for 30 minutes, then uncover and bake 10-15 minutes more until top is golden and crispy.
Make-Ahead Timeline:
✔ 3 days before: Cube and dry out bread, store in large bowl covered with kitchen towel
✔ 1 day before: Prepare entire recipe through step 4, cover tightly with foil, refrigerate
✔ Thursday: Bring to room temperature for 30 minutes, then bake as directed (may need extra 5-10 minutes since it’s cold)
Storage Tips: Assembled unbaked stuffing keeps covered in refrigerator for up to 24 hours. Use a disposable aluminum pan if you need to free up your baking dish.
Reheating: If making ahead, bake directly from refrigerator adding 10-15 minutes to cooking time. For leftovers, reheat covered at 325°F until warmed through.
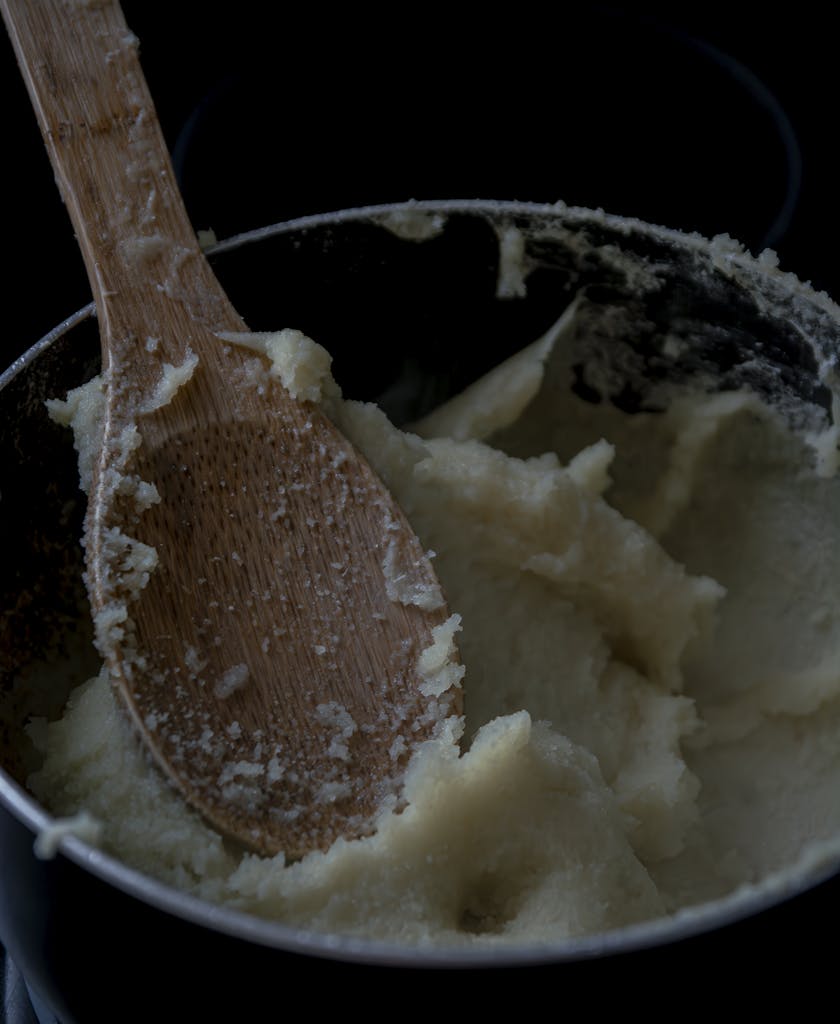
Classic Mashed Potatoes
Yes, you can absolutely make mashed potatoes ahead. This is a game-changer.
Serves: 10-12
Prep time: 20 minutes
Cook time: 25 minutes
Ingredients:
- 5 pounds russet or Yukon gold potatoes
- 1 cup butter, divided
- 1 cup whole milk, warmed
- 1 cup sour cream
- 4 oz cream cheese, softened
- Salt and white pepper to taste
- Chives for garnish
Instructions:
- Prep potatoes: Peel and cube potatoes into 2-inch chunks. Keep them uniform so they cook evenly.
- Boil: Place in large pot, cover with cold water, add generous salt. Bring to boil, then reduce heat and simmer until fork-tender (about 20 minutes).
- Drain thoroughly: This is important. Let them sit in the colander for a few minutes to steam dry.
- Mash: Return potatoes to pot. Add ½ cup butter and mash until smooth. (Use a potato masher or ricer – not a food processor unless you want glue.)
- Make them creamy: Add warm milk, sour cream, cream cheese, and remaining butter. Stir until smooth and fluffy. Season generously with salt and pepper.
Make-Ahead Timeline:
✔ 2 days before: Make mashed potatoes completely, transfer to greased baking dish, dot top with extra butter, cover tightly with plastic wrap pressed directly on surface (this prevents a skin from forming), then cover with foil, refrigerate
✔ Thursday: Remove from fridge 1 hour before reheating, bake covered at 350°F for 30-40 minutes until hot, stir before serving
Storage Tips: Store in covered baking dish with plastic wrap pressed directly against the surface to prevent drying. The extra butter and sour cream keep them creamy even after refrigeration.
Reheating: Add a splash of warm milk or cream when reheating if they seem dry. Stir gently to restore creaminess.
Pro tip: Make these in a slow cooker for serving if you’re tight on oven space. Transfer reheated potatoes to slow cooker on low to keep warm during dinner.
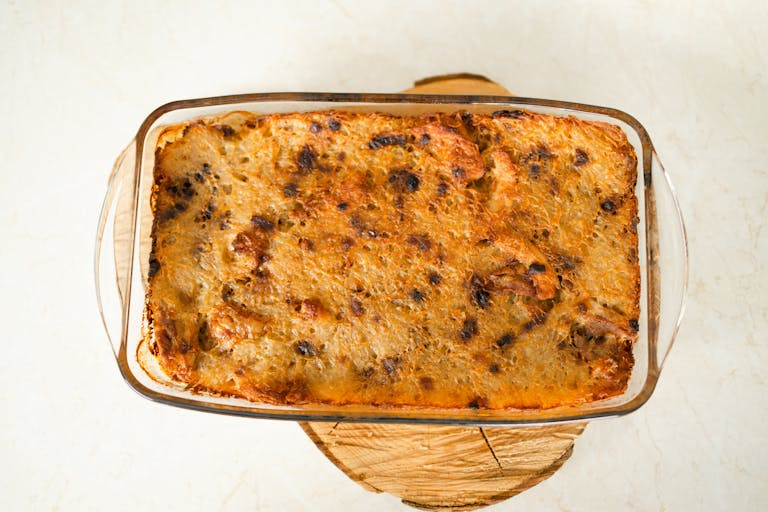
Simple Green Bean Casserole
The classic that everyone expects. Don’t mess with tradition.
Serves: 10-12
Prep time: 15 minutes
Cook time: 30 minutes
Ingredients:
- 3 pounds fresh green beans, trimmed
- 1 can (10.5 oz) cream of mushroom soup
- 1 cup sour cream
- 1 cup shredded cheddar cheese
- ½ teaspoon garlic powder
- ½ teaspoon black pepper
- 1 can (6 oz) French fried onions
- Salt to taste
Instructions:
- Blanch green beans: Bring large pot of salted water to boil. Add green beans, cook 5 minutes until bright green and crisp-tender. Immediately drain and plunge into ice water to stop cooking. Drain well.
- Make the sauce: In large bowl, mix soup, sour cream, cheese, garlic powder, and pepper.
- Combine: Add green beans to sauce, toss to coat. Season with salt to taste.
- Assemble: Transfer to greased 9×13-inch baking dish. Top with half the fried onions.
- Bake: Bake at 350°F for 25 minutes. Add remaining fried onions and bake 5 minutes more until golden and bubbly.
Make-Ahead Timeline:
✔ 2 days before: Trim and blanch green beans, store in sealed container in fridge
✔ 1 day before: Assemble casserole through step 4, cover with foil (don’t add onions yet), refrigerate
✔ Thursday: Bake from refrigerator at 350°F for 30 minutes covered, then add onions and bake 5 minutes uncovered
Storage Tips: Assembled casserole keeps covered in refrigerator for up to 24 hours. Don’t add the crispy onion topping until just before final baking or they’ll get soggy.
Reheating: Bake covered to prevent drying, then uncover for final crisping of onions.
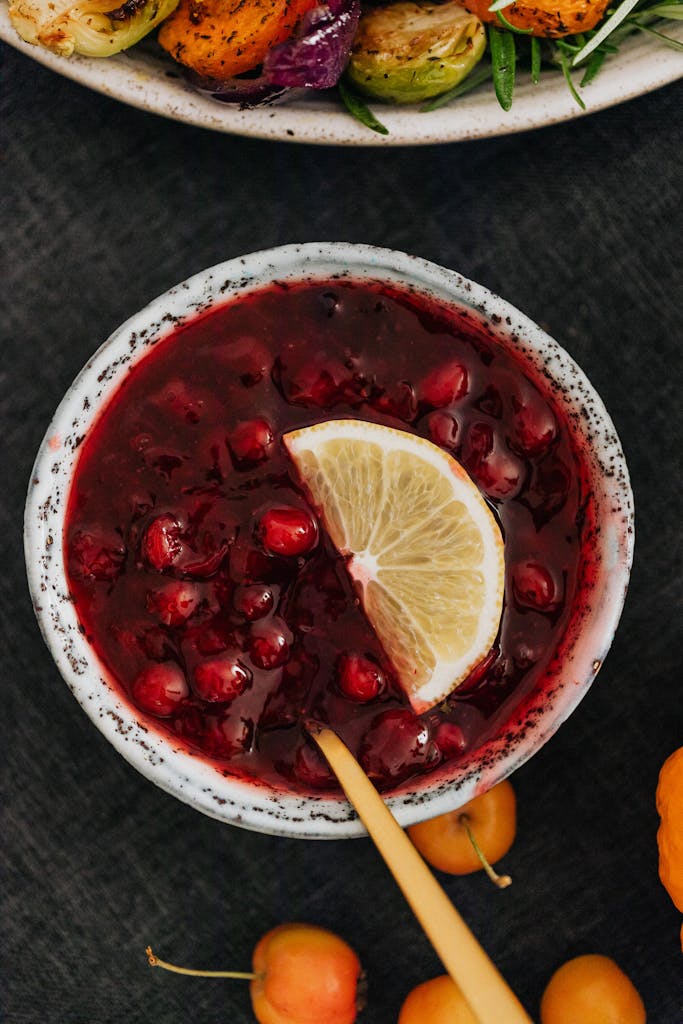
Perfect Cranberry Sauce
Homemade cranberry sauce is so easy, you’ll never buy canned again.
Makes: About 3 cups
Prep time: 5 minutes
Cook time: 15 minutes
Ingredients:
- 1 bag (12 oz) fresh cranberries
- 1 cup sugar
- 1 cup orange juice
- 1 tablespoon orange zest
- 1 cinnamon stick
- Pinch of salt
Instructions:
- Combine everything: Place all ingredients in medium saucepan.
- Simmer: Bring to boil over medium heat, then reduce to simmer. Cook about 10-15 minutes, stirring occasionally, until cranberries pop and sauce thickens.
- Cool: Remove cinnamon stick. Let cool to room temperature (it will thicken more as it cools).
- Refrigerate: Transfer to jar or serving bowl, cover, and refrigerate until serving.
Make-Ahead Timeline:
✔ 1 week before: Make cranberry sauce completely, store in covered container or mason jar in refrigerator (it actually tastes better after sitting a few days!)
✔ Thursday: Remove from fridge 30 minutes before serving to take chill off
Storage Tips: Keeps in airtight container in refrigerator for up to 2 weeks. Mason jars work perfectly and look pretty on the table.
Reheating: No reheating needed – serve at room temperature or chilled.
Pro tip: This is the easiest make-ahead dish on your entire menu. Make it a week early and check it off your list.
Classic Gravy
Good gravy is the secret to Thanksgiving success. Here’s how to make it foolproof.
Makes: About 4 cups
Prep time: 10 minutes
Cook time: 15 minutes
Ingredients:
- Turkey drippings from roasting pan
- ¼ cup butter (if needed)
- ¼ cup flour
- 4 cups turkey or chicken stock, warmed
- Turkey neck and giblets (optional, for extra flavor)
- Salt and pepper to taste
- 2 tablespoons fresh herbs (optional)
Instructions:
- Make ahead (optional): Simmer turkey neck and giblets in stock for 1 hour, strain, and refrigerate. This gives you rich stock for gravy base.
- Start with drippings: After turkey is done, pour drippings from roasting pan into fat separator. Let fat rise to top.
- Make roux: In large saucepan, melt ¼ cup fat from drippings (or use butter if there isn’t enough fat). Whisk in flour, cook 2-3 minutes until golden.
- Add stock gradually: Slowly whisk in warm stock, stirring constantly to prevent lumps. Bring to simmer.
- Simmer and season: Cook 10 minutes until thickened to desired consistency. Season with salt, pepper, and herbs. Strain if there are any lumps.
Make-Ahead Timeline:
✔ 2 days before: Make rich stock by simmering neck and giblets, strain, refrigerate
✔ Wednesday: Make gravy base using this stock and a roux, refrigerate in covered container
✔ Thursday: Reheat gravy base, add turkey drippings from roasting pan for final flavor, simmer until perfect consistency
Storage Tips: Store in glass jar or container in refrigerator. Fat will rise to top – scrape it off before reheating.
Reheating: Reheat gently on stovetop, whisking frequently. Add warm stock or drippings if too thick.
Pro tip: Having a gravy base made ahead takes so much pressure off. You can always enhance it with fresh drippings on Thursday.
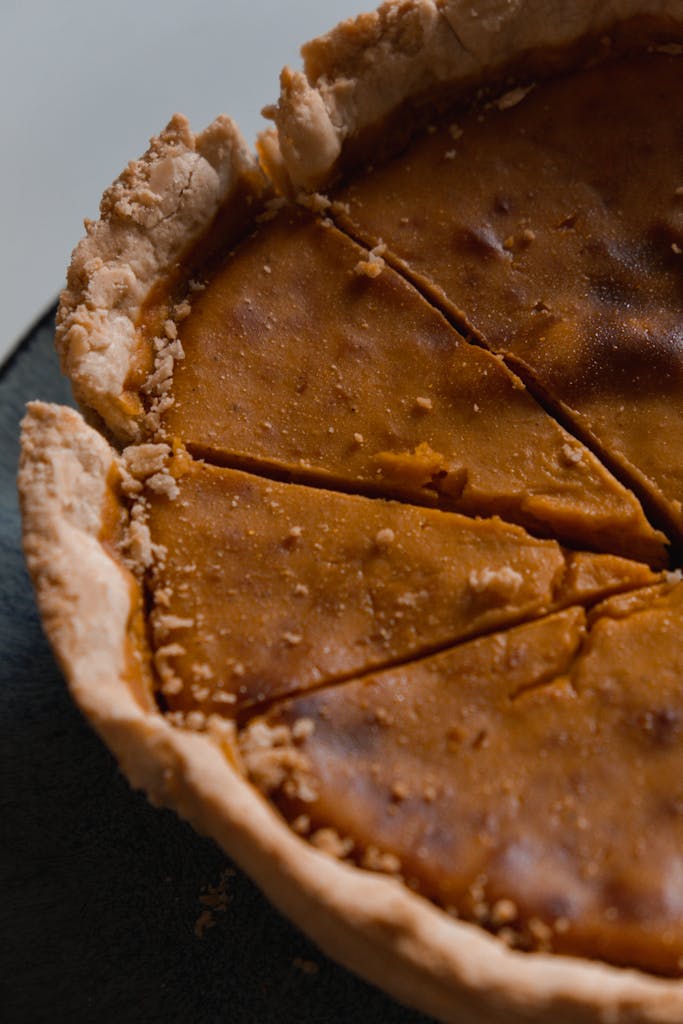
Traditional Pumpkin Pie
No Thanksgiving is complete without pumpkin pie. This classic recipe never disappoints.
Serves: 8
Prep time: 15 minutes
Cook time: 50-60 minutes
Ingredients:
- 1 unbaked 9-inch pie crust (store-bought is fine!)
- 1 can (15 oz) pumpkin puree (not pumpkin pie filling)
- 1 can (14 oz) sweetened condensed milk
- 2 large eggs
- 1 teaspoon cinnamon
- ½ teaspoon ground ginger
- ½ teaspoon nutmeg
- ½ teaspoon salt
- Whipped cream for serving
Instructions:
- Mix filling: In large bowl, whisk together pumpkin, sweetened condensed milk, and eggs until smooth.
- Add spices: Stir in cinnamon, ginger, nutmeg, and salt until well combined.
- Pour into crust: Pour filling into unbaked pie crust. Tap gently on counter to release air bubbles.
- Bake: Bake at 425°F for 15 minutes, then reduce temperature to 350°F and bake 35-40 minutes more until center is almost set (it will jiggle slightly but not be liquid).
- Cool completely: Let cool on wire rack for 2 hours, then refrigerate.
Make-Ahead Timeline:
✔ 2 days before: Bake pie completely, let cool, cover loosely with foil (don’t wrap tightly or condensation will make crust soggy), refrigerate
✔ Thursday: Remove from fridge 30 minutes before serving, top with whipped cream
Storage Tips: Store covered loosely in refrigerator. Don’t add whipped cream until serving time.
Reheating: Pumpkin pie is served chilled or at room temperature – no reheating needed.
Pro tip: Make two pies. There’s never enough pie, and they keep perfectly for days. Plus, you’ve already done the work – might as well double it.
Your Thanksgiving Day Timeline
You’ve prepped, you’ve organized, you’ve made ahead. Now let’s talk about the actual day.
This timeline assumes you’re serving dinner around 4-5 PM. Adjust accordingly if your timing is different, but the order stays the same.
7:00 AM: Wake Up (But Not Too Early)
You’ve done the prep work. No need for a 5 AM start.
- Make coffee
- Take a breath
- Review your timeline for the day
- Put on comfortable clothes you can cook in
8:00 AM: Turkey Goes In
This is your first major task.
- Remove turkey from refrigerator
- Let sit at room temperature for 30 minutes
- Prep and season if not done the night before
- Get turkey in oven
- Set timer for basting (every 45 minutes)
Calculate your timing: Plan on about 15 minutes per pound at 325°F. A 14-pound turkey needs about 3.5 hours. Work backward from your desired dinner time.
10:00 AM: Prep Station Setup
While turkey roasts, set up your workspace.
- Clear counters and create workspace for final prep
- Set out serving dishes and utensils
- Check that everything has serving spoons
- Fill water pitcher, set out butter
11:00 AM: Side Dishes Stage One
Start thinking about your sides.
- Remove casseroles from refrigerator to come to room temperature
- Check turkey, baste if needed
- Start any fresh vegetable prep that’s still needed
12:00 PM: Turkey Checkpoint
Turkey should be about halfway done.
- Check internal temperature
- Baste again
- Make sure it’s browning evenly (tent with foil if getting too dark)
Running behind? It’s okay. Everything can wait while the turkey finishes. Running ahead? Even better – that’s extra resting time.
1:00 PM: Oven Space Strategy
Time to think about oven real estate.
- Calculate when turkey will be done
- Plan when each casserole needs to go in
- Remember: turkey needs 30 minutes rest time OUT of oven
- Use that rest time to bake sides at higher temperature
2:00 PM: Final Push Begins
Turkey should be getting close.
- Set table if not already done
- Arrange appetizers if serving them
- Pour yourself a drink (you’ve earned it!)
- Take a moment to actually get ready
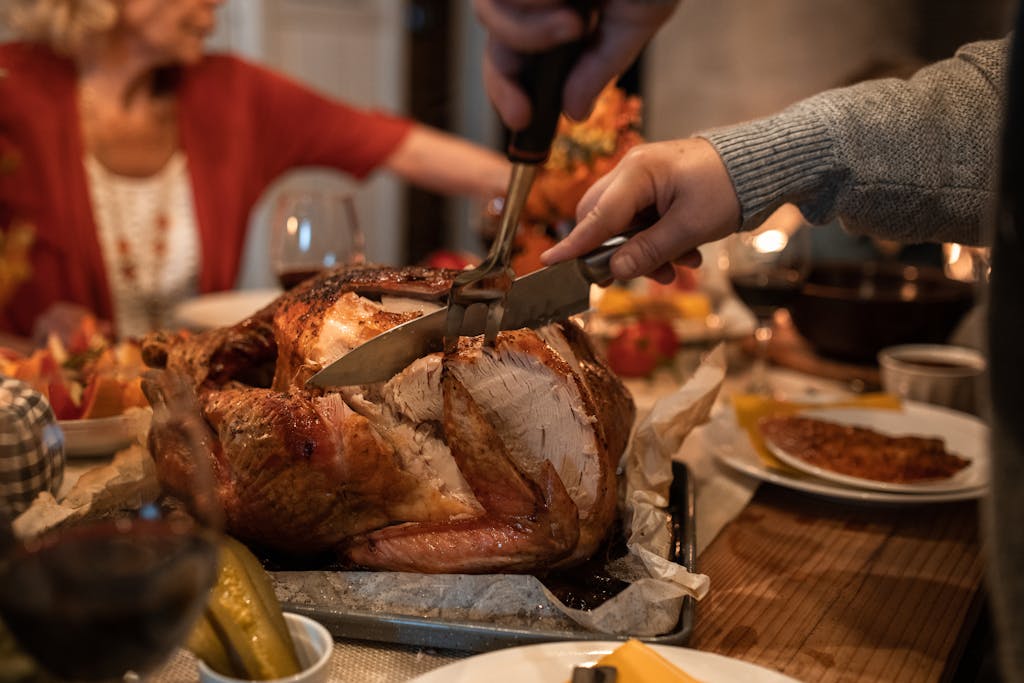
2:30 PM: Turkey Is Done!
Your bird reaches 165°F internal temperature.
- Remove turkey from oven
- Tent loosely with foil
- Let rest for 30 minutes (this is mandatory – don’t skip it!)
- Crank oven to 350-375°F for sides
- Start gravy using drippings
3:00 PM: Side Dishes Go In
Now you own the oven.
- Get casseroles in oven
- Reheat mashed potatoes
- Warm stuffing
- Keep checking – everything should be hot by 3:45
3:30 PM: Final Details
The home stretch.
- Carve turkey (or delegate this!)
- Transfer sides to serving dishes
- Warm dinner rolls
- Do final garnishing
- Light candles, turn on music
4:00 PM: Dinner Is Served!
You did it.
Everything’s hot, everything’s ready, and you actually had time to shower and put on real clothes.
Pro tip: Give yourself grace if timing isn’t perfect. Food staying warm an extra 20 minutes while everyone gathers? Totally fine. Turkey resting an extra 15 minutes? Even better. This isn’t a restaurant with table turnover – it’s Thanksgiving.

The Smart Leftover Strategy
Okay, so you survived Thanksgiving Day. Congratulations! But now you’re staring at enough food to feed your family for a week, and your refrigerator organization is about to be tested.
Let’s talk leftover strategy, because this is where a little planning saves you from food waste and decision fatigue for days to come.
Before Guests Arrive: Prep Your System
The best time to think about leftovers is before Thanksgiving even starts.
Have These Ready:
✔ Glass containers with lids in multiple sizes
Better than disposable, and they’ll be in your kitchen forever. Invest in a good set.
✔ Labels and a Sharpie
Trust me, by Sunday you won’t remember what’s in that container or when you made it.
✔ Freezer bags
For items you’ll freeze (and you should freeze some – future-you will be grateful for that emergency dinner).
✔ Guest containers if you’re sending food home
Disposable containers are perfect for this. Don’t expect to get your good containers back (we’ve all lived that disappointment).
Pro tip: Have your container station set up near the kitchen. As you’re putting food away after dinner, you can efficiently sort what stays, what goes to guests, and what gets stored for later.
Strategic Leftover Organization
Here’s how to actually organize those leftovers so they get eaten instead of forgotten in the back of the fridge.
The 48-Hour Rule
Most refrigerated leftovers are at their best within 48 hours. After that, they’re still safe (up to 3-4 days), but quality declines. Plan your leftover meals accordingly.
Portion Control Strategy
Don’t just throw everything in huge containers. That’s how you end up reheating more than you’ll eat.
For turkey:
- 2-cup containers with just meat (for sandwiches, salads, quick meals)
- Larger portions with gravy (for reheating as a meal)
- Dark meat separate from white meat (they reheat differently)
For sides:
- Individual meal-sized portions (perfect for quick lunches)
- Family-sized portions if you’ll reheat for dinner
For casseroles and stuffing:
- Flat storage in shallow containers (reheats more evenly)
- Individual portions for lunches
Store Smart:
- Front of fridge: Items to eat first (2-3 days max)
- Middle shelves: Week-long storage items
- Freezer: Anything you won’t eat within 4 days
Label everything with the date. “Turkey – Thurs” or “Stuffing – 11/28” saves you from the guessing game later.
What to Freeze (and How)
Not eating turkey for seven straight days? Freeze some of it.
Best items to freeze:
- Turkey meat: Slice or cube it, portion into freezer bags with air pressed out, lay flat for space-efficient storage
- Stuffing: Freezes beautifully, reheat directly from frozen
- Cranberry sauce: Keeps in jar in freezer for months
- Gravy: Freeze in ice cube trays, then transfer cubes to freezer bag (perfect portions!)
- Mashed potatoes: Controversial, but they do freeze (texture changes slightly)
Items that don’t freeze well:
- Green bean casserole (the vegetables get mushy)
- Fresh salads or raw vegetables
- Cream-based items (they can separate)
Freezing tips:
- Let everything cool completely first
- Remove as much air as possible from bags
- Lay bags flat while freezing (they stack beautifully once frozen)
- Label with contents AND date
- Use within 2-3 months for best quality
Quick Leftover Meal Ideas
Because you don’t want to just reheat the same plate for five days straight.
Friday: Classic Leftover Day Let’s be real – you’re making sandwiches. But make them good sandwiches.
- Turkey, cranberry sauce, and stuffing between soft rolls
- Add lettuce, mayo, maybe some crispy bacon
- Reheat leftover sides as is
Saturday: Turkey Soup Day This is where that turkey carcass shines.
- Simmer carcass with onion, carrots, celery for rich stock
- Add leftover turkey meat, vegetables, and noodles
- Season with herbs and serve with crusty bread
Sunday: Thanksgiving Bowl Everything in one bowl – it’s brilliant and weirdly delicious.
- Base of greens or grains
- Add reheated turkey, stuffing, mashed potatoes
- Drizzle with gravy
- Top with cranberry sauce
Monday: Stuffing Waffles Yes, really. This is genius.
- Press leftover stuffing into waffle maker
- Cook until crispy
- Top with turkey and cranberry-gravy drizzle
- Breakfast or dinner – you choose
Tuesday: Leftover Pot Pie Use up all the random bits.
- Combine leftover turkey, vegetables, gravy in baking dish
- Top with store-bought pie crust or puff pastry
- Bake until golden and bubbly
Leftover Storage Containers You Actually Need
Let’s talk about the containers that make this whole system work.
The Essential Collection:
2-cup containers (get 6-8 of these):
Perfect for individual portions of turkey, sides, or soup. These are your lunch containers.
4-cup containers (get 4-6):
Family-sized portions, leftover casseroles, larger amounts of sides.
Large shallow containers:
For storing turkey slices flat, reheating casseroles evenly.
Mason jars (1-pint and 1-quart):
Cranberry sauce, gravy, soup. They stack beautifully and are crystal clear so you see what’s inside.
Freezer bags (quart and gallon):
For anything going into long-term storage.
Heavy-duty foil:
For covering and storing larger items in their baking dishes.
Investment tip: Buy glass containers with lids that actually seal. You’ll use them year-round, and they won’t stain or hold odors like plastic. This isn’t just Thanksgiving storage – this is kitchen organization for life.
The Reality Check
Here’s the truth: Even with the best organization system, you might not eat all the leftovers. And that’s okay.
If by Monday you’re sick of turkey, freeze the rest. If the green bean casserole didn’t get touched, it’s okay to let it go. If you have friends or family who’d appreciate leftovers, send them home with containers.
The goal isn’t perfection. The goal is reducing food waste where you can, having a system that makes leftovers appealing instead of a chore, and not wasting mental energy on “what should I do with this?”
You just pulled off Thanksgiving. You’re allowed to order pizza on Monday if you want.
You’ve Got This
Here’s what you need to remember: Thanksgiving doesn’t have to be stressful. It really doesn’t.
The chaos, the panic, the “why did I volunteer to host this” moment you have every year? That comes from trying to do everything at once, without a plan, and hoping it all magically comes together.
But you’ve got the plan now. You’ve got traditional recipes that actually work. You’ve got a kitchen organized to support you. You’ve got a timeline that spreads the work across several days instead of cramming it all into Thursday morning.
Most importantly, you’ve got permission to let go of perfection.
If your turkey’s a little dry? Pour gravy on it. If the stuffing isn’t picture-perfect? No one cares – they’re too busy enjoying it. If dinner runs 30 minutes late? Everyone’s talking and having a good time anyway.
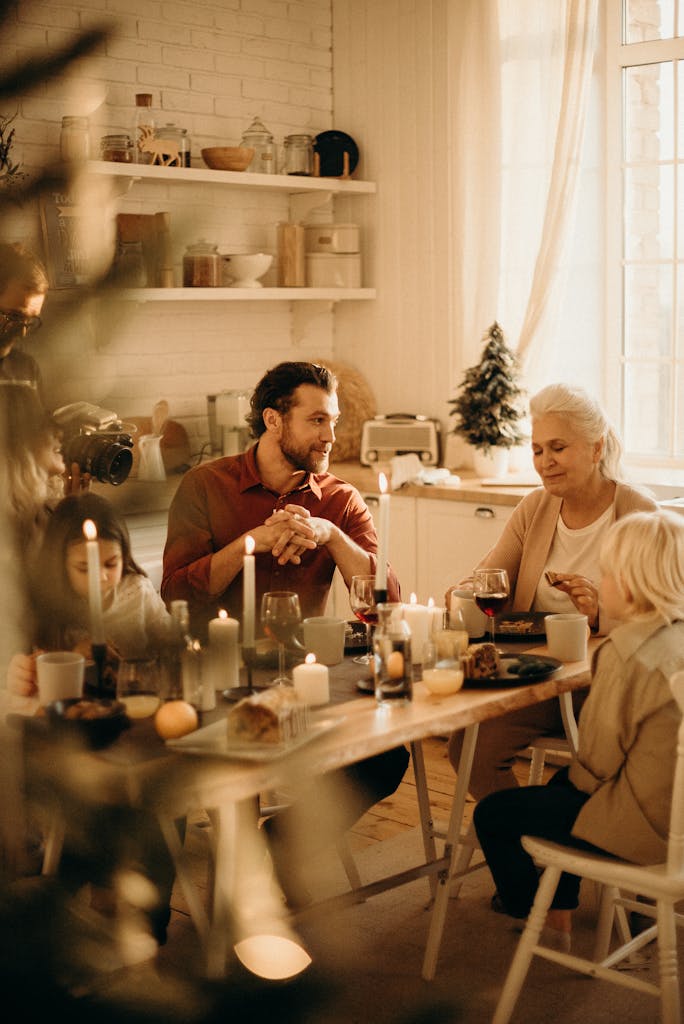
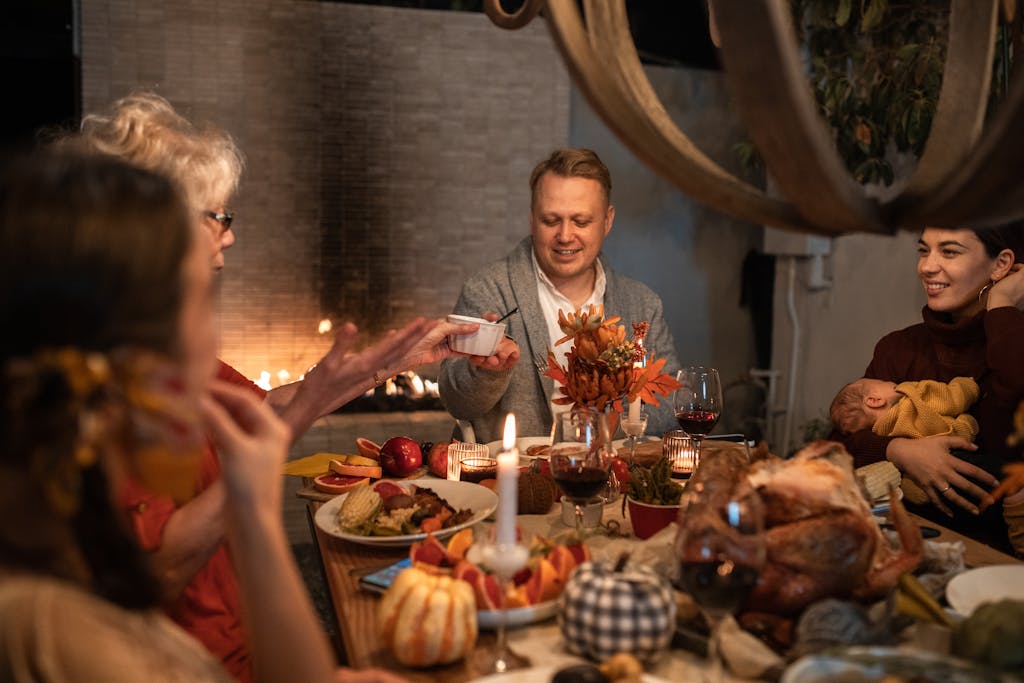
The whole point of Thanksgiving isn’t executing a flawless meal. It’s gathering people you care about around your table and creating a moment together. That’s it.
Everything else – the perfectly golden turkey, the Pinterest-worthy table setting, the homemade centerpiece – that’s all just extra. Nice if it happens, but not the point.
What they’ll remember isn’t whether your mashed potatoes were lumpy. They’ll remember the laughter, the stories, the feeling of being together. They’ll remember that you brought everyone to your table and created space for gratitude and connection.
And thanks to your organization and planning? You’ll actually be present for those moments instead of stressed in the kitchen wondering if anything is going to be ready on time.
So take a breath. You’ve got this.
The work you do this week – the decluttering, the organizing, the make-ahead prep – that’s not just about food. It’s about creating space for what actually matters. It’s about removing the stress so you can enjoy your own holiday.
And next year? You’ll have this guide bookmarked, your timeline saved, and you’ll feel even more confident doing it all again.
Happy Thanksgiving. Now go create that calm, organized celebration you deserve.
Related Articles You’ll Love:
- How to Declutter Your Kitchen (Full Guide)
- Kitchen Organization Essentials You Actually Need
- Get Your Home Ready for Christmas
- Organize Your Small Pantry Like a Pro
- Sunday Reset Routine for an Organized Week
- How to Maintain an Organised Home with a Family