Bedroom Decluttering Checklist for a Calm Space
If your bedroom feels more like a storage unit than a sanctuary, you are not alone. Piles of clothes on the chair, nightstands buried under books and chargers, and closets that no longer close properly can quietly chip away at your ability to rest and recharge. Research consistently links visual clutter to higher stress levels and poorer sleep quality, which means a messy bedroom is not just an eyesore. It is actually working against you. The good news? With a clear, step-by-step bedroom decluttering checklist in hand, you can turn that chaotic space into the calm retreat you deserve without feeling overwhelmed.
Table of Contents
- Gather your decluttering supplies
- Decluttering your bedroom: Step-by-step checklist
- Mistakes to avoid when decluttering your bedroom
- Maintaining a clutter-free bedroom: Habits and follow-up
- The surprising truth about bedroom clutter: Why less is truly more
- Ready for more peace and order? Next steps with Simple Neat Home
- Frequently asked questions
Key Takeaways
| Point | Details |
|---|---|
| Prep before you start | Gather all supplies in advance to keep your decluttering session running smoothly. |
| Declutter one zone at a time | Break your bedroom into smaller zones to make the process less overwhelming and more effective. |
| Beware of common pitfalls | Avoid mistakes like trying to do it all in one go or keeping items ‘just in case.’ |
| Maintain with simple habits | Regular check-ins and tiny habits help make a clutter-free bedroom sustainable. |
Gather your decluttering supplies
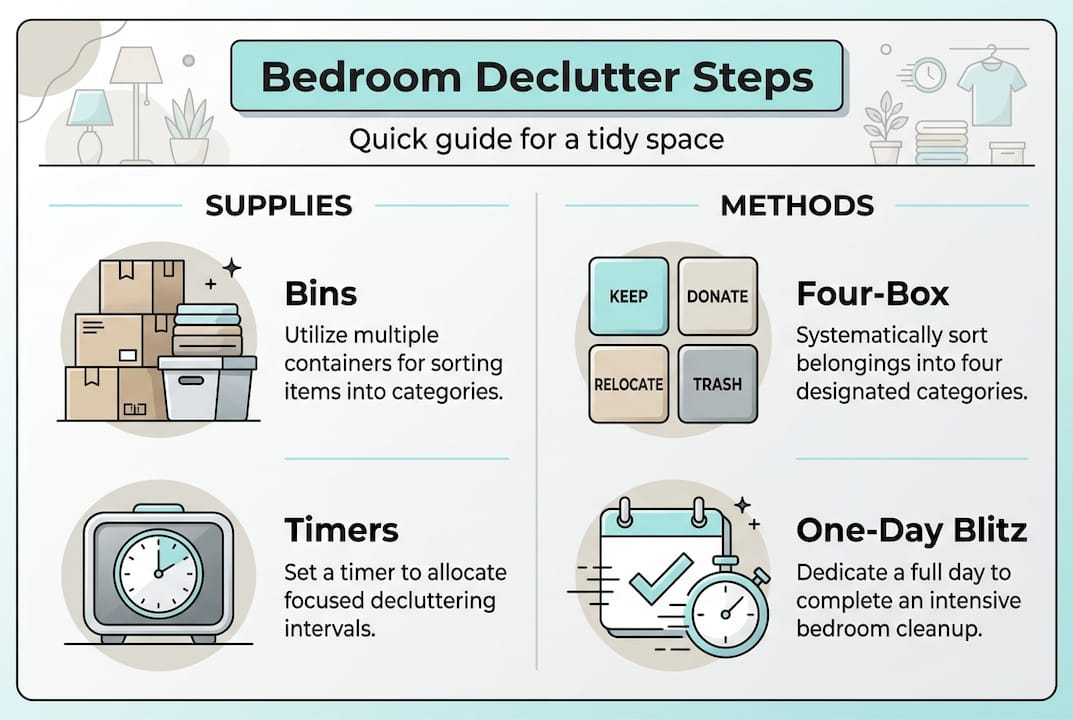
Now that you understand the value of decluttering, let’s start by gathering everything you’ll need before you move a single item. One of the biggest reasons people stall mid-declutter is because they stop to hunt for a trash bag or a marker. Preventing those interruptions starts with having the right tools ready to go before you begin.
Here are the essential supplies you will want on hand:
- Donation bags (large, sturdy ones work best)
- Trash bags for items that cannot be donated or recycled
- Clear storage bins for things you are keeping but need to organize
- Cleaning cloths or microfiber cloths for wiping surfaces as you go
- Permanent markers and labels for identifying bins and boxes
- Sticky notes for quick reminders or flagging items to relocate
As the essential bedroom decluttering tips on Simple Neat Home explain, separate bins or bags streamline the sorting process so you are not second-guessing yourself mid-session. Having a clear home for each category, keep, donate, trash, or relocate, removes the mental load from the process.
Here is a quick reference table so you know exactly what each supply does:
| Supply | Purpose |
|---|---|
| Donation bags | Collect items to give away or drop at a charity shop |
| Trash bags | Dispose of broken, expired, or unusable items |
| Clear storage bins | Organize kept items visibly so nothing gets lost |
| Microfiber cloths | Wipe down surfaces as each zone is cleared |
| Markers and labels | Identify contents of bins for easy future access |
| Sticky notes | Flag items to move to another room |
Once everything is gathered and laid out, you are ready to focus entirely on the task without scrambling for supplies.
Pro Tip: Set a timer for 20 to 30 minutes per zone. Working in short bursts keeps your energy up and prevents that dreaded burnout that turns a one-hour job into a three-day project. When the timer goes off, take a five-minute break before starting the next zone.
Decluttering your bedroom: Step-by-step checklist
With your supplies ready, it is time to follow a proven sequence and tackle your bedroom space one zone at a time. Jumping around the room randomly is one of the fastest ways to feel overwhelmed. Instead, work through each zone deliberately.
As any complete decluttering guide will tell you, breaking decluttering into steps makes the process less overwhelming and far more successful. Here is the zone-by-zone checklist I recommend:
Zone 1: Bedside tables
- Remove everything from the surface and both drawers.
- Toss expired medications, old receipts, and dead batteries.
- Keep only what you actively use at night, like a book, lip balm, or phone charger.
- Relocate anything that belongs elsewhere.
Zone 2: Under the bed
- Pull out every single item (yes, all of it).
- Vacuum or sweep the floor underneath.
- Only return items that are in labeled bins or flat storage containers.
- Donate or toss anything you forgot was even there.
Zone 3: Closet
- Remove all clothing and sort into keep, donate, and toss piles.
- Rehang only what fits, is in good condition, and you have worn in the past year.
- Store off-season items in clearly labeled bins on upper shelves.
Zone 4: Dressers and surfaces
- Clear every surface completely before deciding what goes back.
- Limit each surface to a maximum of three to five intentional items.
- Fold and reorganize drawer contents by category.
For tips on decluttering your bedroom fast when time is tight, there are some excellent shortcuts worth knowing.
“The secret to getting started is breaking your complex, overwhelming tasks into small, manageable ones.” Starting with just one drawer or one surface builds momentum without the paralysis of staring at an entire room.
Pro Tip: Try the Four-Box Method as you sort each zone. Label four boxes: Keep, Donate, Trash, and Relocate. Every item you pick up goes into one of these four boxes, no exceptions. It removes the endless decision fatigue of putting things back down.
Here is a quick comparison to help you decide which approach suits your schedule:
| Method | Best for | Time needed |
|---|---|---|
| One-day blitz | Motivated starters, small bedrooms | 4 to 6 hours |
| Multi-day approach | Busy families, larger spaces | 30 to 60 min per day over 1 week |
Mistakes to avoid when decluttering your bedroom
Even with a solid checklist, decluttering pitfalls can sabotage your progress. Here is what to watch out for and how to keep your efforts on track.
These are the most common mistakes I see people make:
- Not sorting as you go. Piling everything in the middle of the room and then moving it all back is exhausting and unproductive.
- Keeping items “just in case.” If you have not used it in over a year and it does not bring you real joy or function, it is time to let it go.
- No maintenance plan. Decluttering without a follow-up routine means the clutter will creep back within weeks.
- Starting too big. As the decluttering strategy tips from Simple Neat Home point out, tackling the entire room at once can lead to burnout and unfinished projects.
- Letting perfectionism win. An almost-organized bedroom beats a perfectly planned but never-started one every single time.
“Done is better than perfect.” Waiting until you have the ideal bins, the perfect labels, or a completely free weekend means the clutter stays. Give yourself permission to make progress, not perfection.
Pro Tip: When dealing with sentimental items, do not try to tackle them in the middle of a decluttering session. Put them in a separate box, set it aside, and come back to it with fresh eyes on a different day. Emotions run high when you are tired, and you will make clearer decisions with a little distance.
Staying motivated after a setback is simpler than it sounds. Pick one tiny task, like clearing just the nightstand, and do only that. Momentum builds from small wins, not grand gestures. And if you want to make small bedrooms feel bigger as you go, strategic decluttering is honestly the most effective first step.
Maintaining a clutter-free bedroom: Habits and follow-up
To make your hard work last, let’s establish some routines and follow-up strategies so your bedroom remains calm and clutter-free long after the big session is done.
A maintenance routine truly prevents clutter from creeping back and keeps your bedroom decluttering maintenance results lasting far longer. Here is how to build that routine without it feeling like a chore:
Weekly habits checklist:
- Do a 5-minute nightly reset before bed. Put away anything that landed on the floor or chair during the day.
- Return items to their designated spot as soon as you are done using them.
- Donate or recycle one item per month minimum. It adds up faster than you think.
- Do a quick visual scan each Sunday to spot anything creeping back into clutter territory.
Monthly surface and cupboard review (numbered steps):
- Open every drawer and remove items that do not belong.
- Wipe down the inside of drawers and shelves.
- Check your donation bag; if it is full, drop it off before the week is out.
- Reassess the top of your dresser and nightstand. Does every item there earn its spot?
- Adjust storage solutions if something is clearly not working for your routine.
The ongoing decluttering routine does not need to be complicated. Consistency beats intensity every time.
Pro Tip: Schedule a seasonal declutter (every three to four months) directly in your calendar app as a recurring reminder. Treat it like any other appointment. Seasonal shifts in clothing alone make this review incredibly useful, and you will thank yourself every time a new season rolls around.
The surprising truth about bedroom clutter: Why less is truly more
After laying out all these steps, I want to share something I have learned from real experience: most people overcomplicate this whole thing. They look at Pinterest boards filled with color-coded closets and matching storage baskets and decide their efforts are not good enough before they have even started.
Here is my honest take. Striving for a “Pinterest perfect” bedroom can actually backfire. I have seen it happen. People spend more time planning the perfect system than actually clearing one drawer. The pressure to get it exactly right becomes the very reason nothing changes.
What genuinely works? Small, consistent progress. Clearing your nightstand this week. Donating that bag of old clothes next week. Those quiet wins add up to a bedroom that truly supports real life rather than one that just looks good in a photo. If you want realistic decluttering results, start with what you can actually finish today.
The best checklist is the one you will actually use. Adapt it, simplify it, make it yours. Your bedroom should feel like a retreat for you, not a showroom for anyone else.
Ready for more peace and order? Next steps with Simple Neat Home
With your bedroom sorted, you can apply these same principles throughout your entire home, and I am here to help you every step of the way. At Simple Neat Home, we have a growing library of guides, checklists, and practical methods designed to make organizing feel less like a task and more like a win.
If you are ready to tackle other rooms, start with our living room decluttering checklist for a clear, zone-by-zone approach. Or, if you are looking for a fun challenge to keep the momentum going, try declutter 100 items in 10 days using our simple method. Sustaining an organized home is so much easier when you have the right support and a plan that actually fits your life.
Frequently asked questions
How often should you declutter your bedroom?
A seasonal declutter every 3 to 4 months keeps your bedroom organized and stops clutter from quietly building up between sessions. As seasonal decluttering shows, regular check-ins prevent the return of clutter far more effectively than one big annual clear-out.
Which area of the bedroom should I declutter first?
Start with your bedside table or any clear surface for a quick, satisfying win, then move into closets or drawers. Clearing surfaces delivers instant visual results that motivate you to keep going.
What are the best storage solutions for a small bedroom?
Multi-functional furniture, under-bed bins, and vertical shelves are your best friends in a compact space. Using vertical space significantly increases your available storage without adding square footage.
How can I stay motivated to maintain a clutter-free bedroom?
Set a recurring calendar reminder, loop in a family member for a little accountability, and celebrate every small win along the way. Accountability helps maintain your decluttering progress better than willpower alone ever will.
Recommended
- Step by Step Decluttering Guide for a Calm Home | Simple Neat Home
- Ultimate Living Room Decluttering Checklist for a Fresh Space | Simple Neat Home
- Beyond Books: 5 Unexpected Things to Declutter for Mental Clarity | Simple Neat Home
- 7 Essential Tips for Your Decluttering Checklist 2025 | Simple Neat Home
- How to photograph your home for a home swap | SwapSpace