Kitchen deep clean: step-by-step guide for spotless kitchens
Many people believe a quick wipe of counters and a sweep of the floor keeps their kitchen clean. However, this routine barely scratches the surface. True kitchen hygiene requires deep cleaning that targets hidden grime, bacteria, and buildup in appliances, cabinets, and hard-to-reach corners. A thorough kitchen deep clean transforms your space into a healthier, more organized environment where cooking becomes enjoyable again. This guide walks you through what deep cleaning involves, why it matters for your family’s health, and exactly how to achieve a spotless kitchen that stays fresh longer.
Table of Contents
- What Kitchen Deep Cleaning Involves And Why It Matters
- Step-By-Step Guide To Performing A Thorough Kitchen Deep Clean
- Tools, Products, And Techniques For Effective Kitchen Deep Cleaning
- Maintaining Your Kitchen After A Deep Clean: Tips For Lasting Hygiene And Organization
- How Simple Neat Home Can Help You Keep A Clean, Organized Kitchen
- Frequently Asked Questions
Key takeaways
| Point | Details |
|---|---|
| Deep cleaning targets hidden dirt | It goes beyond daily tidying to eliminate bacteria and grime in appliances and crevices. |
| Comprehensive process required | Includes decluttering, scrubbing appliances, surfaces, cabinets, and disinfecting high-touch areas. |
| Right tools ensure success | Microfiber cloths, gentle degreasers, and natural cleaners deliver hygienic results safely. |
| Regular maintenance sustains cleanliness | Daily habits and scheduled deep cleans every 3-6 months prevent buildup and save time. |
What kitchen deep cleaning involves and why it matters
Surface cleaning handles visible messes like crumbs and spills, but deep cleaning attacks the invisible threats lurking in your kitchen. Deep kitchen cleaning targets grime, bacteria, and buildup missed by daily cleaning routines. This comprehensive approach includes tasks most people skip during regular tidying.
A true deep clean covers appliance interiors like refrigerator shelves, oven racks, and microwave walls. It involves scrubbing cabinet fronts and handles, cleaning grout lines between tiles, degreasing vent hoods, and wiping baseboards. You tackle the refrigerator coils, dishwasher filters, and the space behind your stove. These areas accumulate grease, food particles, and dust that become breeding grounds for bacteria and mold.
The health benefits alone justify the effort. Removing bacteria from cutting boards, sink drains, and appliance seals reduces your family’s exposure to foodborne illnesses. Eliminating mold spores from damp areas protects against respiratory issues and allergies. A deep cleaned kitchen simply makes your home safer.
Beyond hygiene, deep cleaning transforms your kitchen’s organization and functionality. Decluttered countertops create more workspace for meal prep. Clean, organized cabinets make finding ingredients faster. When every surface shines and everything has its place, cooking becomes less stressful and more creative. You rediscover tools and ingredients buried in cluttered drawers. Your kitchen shifts from a source of anxiety to a space that invites you to create.
Specific deep cleaning tasks include:
- Emptying and sanitizing the refrigerator, including door seals and drip pans
- Degreasing oven interiors, racks, and stovetop grates
- Descaling coffee makers and cleaning small appliance exteriors
- Scrubbing tile grout and cleaning backsplash surfaces thoroughly
- Wiping cabinet interiors and reorganizing contents
- Cleaning light fixtures, ceiling fans, and air vents
- Washing trash cans inside and out
- Polishing stainless steel appliances and removing water spots
These tasks demand more time than your daily routine, but they create a foundation of cleanliness that makes everyday maintenance easier. When you invest in a proper deep clean, you reset your kitchen to its optimal state.
Step-by-step guide to performing a thorough kitchen deep clean
Following a structured cleaning process ensures no area is overlooked and improves efficiency. Breaking the job into manageable steps prevents overwhelm and delivers consistent results. Start early in the day when you have energy and natural light.
-
Clear and declutter your space. Remove everything from countertops, including small appliances, utensil holders, and decorative items. Empty cabinets one section at a time. Discard expired foods, donate duplicate tools, and relocate items that don’t belong in the kitchen. This step alone reveals how much workspace you actually have.
-
Tackle the refrigerator first. Remove all food and shelves. Wash shelves and drawers in hot soapy water. Wipe interior walls with a mixture of warm water and baking soda. Clean door seals with a toothbrush to remove mold. Vacuum refrigerator coils at the back or bottom to improve efficiency. Return only fresh food, organizing by category and expiration date.
-
Deep clean the oven and stovetop. Apply oven cleaner or a baking soda paste to interior surfaces and let sit per product instructions. Remove and soak oven racks and stovetop grates in hot soapy water. Scrub burner caps and drip pans. Wipe down the oven exterior and control panel. A clean oven heats more evenly and eliminates smoky odors during cooking.
-
Clean the microwave thoroughly. Heat a bowl of water with lemon slices for three minutes to loosen stuck food. Wipe interior surfaces, the turntable, and door seals. Clean exterior surfaces and the control panel. Don’t forget the top of the microwave, which collects grease and dust.
-
Address the dishwasher. Remove and clean the filter at the bottom. Run an empty cycle with white vinegar in a dishwasher-safe cup on the top rack. Wipe door edges, seals, and the exterior. A clean dishwasher actually cleans your dishes better and smells fresher.
-
Scrub sinks and faucets. Use baking soda to scrub sink basins, removing stains and buildup. Clean faucet aerators by unscrewing and soaking in vinegar. Polish fixtures with a microfiber cloth. Sanitize the garbage disposal by grinding ice cubes with lemon peels, then flushing with hot water.
-
Clean countertops and backsplashes. Spray appropriate cleaner for your surface type and let it sit briefly. Scrub tile grout with a brush and baking soda paste. Wipe backsplashes from top to bottom. Dry thoroughly to prevent water spots, especially on granite or marble.
-
Wash cabinet exteriors and hardware. Use a degreaser on cabinet fronts, paying attention to handles and areas near the stove. Wipe cabinet interiors before replacing organized contents. Polish hardware with appropriate cleaner.
-
Disinfect high-touch surfaces. Clean light switches, cabinet handles, appliance controls, and doorknobs with disinfectant. These areas harbor surprising amounts of bacteria from constant hand contact.
-
Finish with floors. Sweep or vacuum thoroughly, moving furniture to reach edges. Mop with appropriate cleaner for your floor type, working from the farthest corner toward the exit. Let floors dry completely before replacing furniture.
Pro Tip: Microfiber cloths trap dirt and bacteria more effectively than cotton rags, and they’re safe on all surfaces without scratching. Keep separate colors for different tasks to prevent cross-contamination.
Tools, products, and techniques for effective kitchen deep cleaning
Having the right supplies transforms deep cleaning from a struggle into a manageable project. Using the right tools and eco-friendly products leads to safer and more effective deep cleans. Quality doesn’t mean expensive; many effective cleaners cost less than commercial products.
Essential tools for deep cleaning include:
- Microfiber cloths in multiple colors for different zones
- Scrub brushes with varying stiffness for different surfaces
- Old toothbrushes for grout and tight spaces
- Rubber gloves to protect hands from cleaners and hot water
- Spray bottles for homemade cleaning solutions
- Bucket for mixing cleaning solutions and soaking items
- Mop with washable pads or traditional string mop
- Vacuum with attachments for reaching coils and vents
- Step stool for safely reaching high cabinets and fixtures
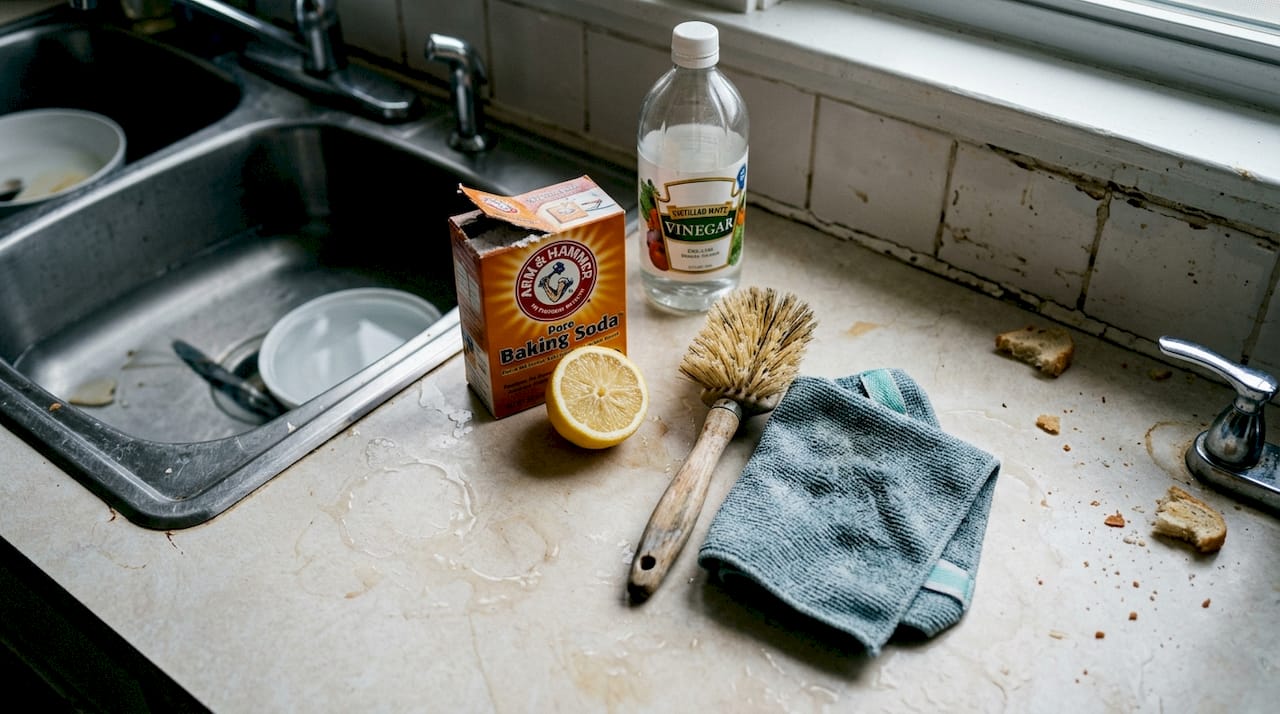
Effective cleaning agents don’t require harsh chemicals. Baking soda works as a gentle abrasive for scrubbing without scratching. White vinegar cuts grease and removes mineral deposits. Lemon juice adds natural degreasing power and leaves a fresh scent. For tougher jobs, choose degreasers specifically formulated for kitchen use that rinse clean without residue. Always select disinfectants safe for food preparation areas, checking labels for kitchen approval.
Smart techniques maximize your effort and results. Clean from top to bottom so dirt falls onto surfaces you haven’t cleaned yet. Work in sections rather than jumping around randomly. Let cleaning products sit for the recommended time; this dwell time allows active ingredients to break down grime, reducing your scrubbing effort. For baked-on messes, apply cleaner and cover with a damp cloth to keep it working longer.
Room segmentation keeps you organized and prevents fatigue. Divide your kitchen into zones: appliance area, sink zone, cooking zone, and storage areas. Complete one zone entirely before moving to the next. This approach provides a sense of progress and prevents the overwhelm of seeing the entire kitchen in disarray.
When mixing homemade cleaners, never combine vinegar with baking soda in a closed container as the reaction creates pressure. Instead, apply baking soda first, then spray vinegar for a fizzing action that lifts dirt. For daily cleaning, a simple solution of dish soap and warm water handles most tasks safely.
Pro Tip: Avoid harsh chemicals that can damage surfaces or leave harmful residues; natural options like vinegar and baking soda clean effectively while protecting your family and the environment from toxic exposure.
Maintaining your kitchen after a deep clean: tips for lasting hygiene and organization
A deep clean creates a fresh start, but regular maintenance after deep cleaning prevents buildup and reduces cleaning time later. Establishing simple daily and weekly routines keeps your kitchen in excellent condition between deep cleans. The key is consistency, not perfection.
Daily maintenance takes just minutes but makes a dramatic difference. Wipe counters and stovetop after each use to prevent grease buildup. Wash dishes immediately or load the dishwasher rather than letting them pile up. Sweep high-traffic areas to remove crumbs and dirt before they spread. Empty the trash before it overflows. These small actions prevent the grime accumulation that necessitates intensive scrubbing later.
Weekly tasks bridge the gap between daily tidying and quarterly deep cleans. Mop floors thoroughly, clean the microwave interior, wipe cabinet fronts, and sanitize the sink. Check the refrigerator for expired items and wipe any spills. These touch-ups take 30 minutes but maintain the cleanliness you worked hard to achieve.
| Task Type | Frequency | Key Benefits |
| — | — | |
| Quick daily clean | Every day | Prevents buildup, takes 10 minutes, maintains hygiene |
| Weekly deep touch-ups | Once weekly | Addresses developing issues, keeps appliances fresh, sustains organization |
Organizational habits support cleanliness. Keep countertops clear by storing appliances you use less than weekly. Designate specific homes for items so family members know where things belong. Use a kitchen declutter checklist periodically to prevent accumulation of unnecessary items. When everything has a place, cleaning becomes faster because you’re not constantly moving clutter.
Schedule your next deep clean before you need it desperately. Mark your calendar for 3 to 6 months out, depending on your household size and cooking frequency. Busy families with heavy kitchen use benefit from quarterly deep cleans, while smaller households might manage with twice-yearly sessions. Treating it like any other important appointment ensures it actually happens.
Involving your family distributes the maintenance workload and teaches valuable life skills. Assign age-appropriate tasks like wiping the table after meals, putting away groceries properly, or taking out trash. When everyone contributes to daily upkeep, the kitchen stays cleaner naturally.
Between deep cleans, address small issues immediately. Wipe up spills when they happen rather than letting them harden. Clean the stovetop while it’s still warm. These micro-actions prevent the stubborn messes that require aggressive scrubbing later.
Pro Tip: Involve the family in simple daily habits to share the maintenance load and teach responsibility; even young children can wipe tables or put away plastic containers, building lifelong cleaning skills.
How Simple Neat Home can help you keep a clean, organized kitchen
Maintaining a spotless kitchen becomes easier with the right resources and guidance. Simple Neat Home offers comprehensive guides that support your cleaning and organization goals beyond this deep clean. Our kitchen declutter checklist helps you systematically remove excess items and create functional storage systems. The kitchen organization guide provides strategies for arranging cabinets, pantries, and drawers so everything stays accessible and tidy. For ongoing maintenance, explore our kitchen cleaning tips that make daily upkeep effortless. These resources work together to help busy adults and families reclaim calm from chaos, transforming your kitchen into a space that truly serves your needs.
Frequently asked questions
What is the difference between a kitchen deep clean and regular cleaning?
Regular cleaning addresses visible messes like wiping counters, washing dishes, and sweeping floors. Deep cleaning targets hidden grime in appliance interiors, cabinet corners, grout lines, and behind equipment. It’s more thorough and less frequent, tackling areas that accumulate bacteria and buildup over months. Think of regular cleaning as maintenance and deep cleaning as a complete reset.
How often should I perform a kitchen deep clean?
Aim for a deep clean every 3 to 6 months depending on kitchen use and family size. Households that cook daily or have young children benefit from quarterly deep cleans. Smaller households with lighter kitchen use can extend to twice yearly. Regular daily and weekly cleaning reduces the burden of deep cleans by preventing severe buildup.
Can natural products effectively deep clean a kitchen?
Yes, products like vinegar, baking soda, and lemon are effective and safe for most surfaces. Vinegar dissolves mineral deposits and cuts grease, while baking soda provides gentle abrasive power for scrubbing. Lemon juice adds natural degreasing strength and antibacterial properties. They offer a chemical-free alternative without sacrificing cleanliness, though very stubborn baked-on messes might require specialized degreasers.
What kitchen areas are most commonly overlooked during deep cleaning?
Refrigerator coils, dishwasher filters, and vent hood interiors top the list of neglected areas. Cabinet tops accumulate thick grease and dust layers. The space behind and under appliances harbors crumbs and grime. Door seals on refrigerators and dishwashers develop mold. Light fixtures and ceiling fan blades collect surprising amounts of dust that falls into food prep areas.
How can I make kitchen deep cleaning less overwhelming?
Break the project into zones and tackle one area per day rather than attempting everything at once. Set a timer for focused 30-minute sessions with breaks. Gather all supplies before starting to avoid interruptions. Play energizing music or a podcast to make the time pass faster. Celebrate small wins as you complete each section, and remember that the results last for months.
Recommended
- How to Clean Kitchen: A Simple Step-by-Step Guide | Simple Neat Home
- How to Clean Kitchen: A Simple Step-by-Step Guide | Simple Neat Home
- 10 Essential Kitchen Cleaning Tips for a Sparkling Home | Simple Neat Home
- Ultimate Kitchen Declutter Checklist | Simple Neat Home
- 10 Essential Tips for Your Spring Cleaning Kitchen Checklist