Bathroom De-cluttering Checklist
Bathroom clutter sneaks up on you. One day your counters are clear, the next they’re buried under half-empty bottles, expired medications, and mystery products you forgot you owned. A chaotic bathroom drains your energy every morning and makes simple routines feel overwhelming. The good news? A structured decluttering checklist transforms this frustrating space into an organized sanctuary without requiring an entire weekend or professional help. This guide walks you through every step to reclaim your bathroom’s calm and functionality.
Table of Contents
- Key takeaways
- Gathering supplies and preparing your bathroom for decluttering
- Step-by-step bathroom decluttering checklist to follow
- Organizing and maximizing bathroom storage space effectively
- Maintaining a clutter-free bathroom: daily habits and periodic checks
- Explore more decluttering and organizing resources
- Frequently asked questions
Key Takeaways
| Point | Details |
|---|---|
| Preparation matters | Preparation sets you up for success by gathering supplies and planning before you begin. |
| Create decluttering zones | Set up four labeled zones keep, donate, toss, and relocate to reduce decision paralysis. |
| Clear surfaces first | Clear every surface and wipe them down before sorting to see what truly belongs. |
| Follow a systematic checklist | Work through the decluttering checklist category by category to prevent overwhelm and show progress. |
Gathering supplies and preparing your bathroom for decluttering
Successful bathroom decluttering starts before you touch a single item. Preparation, including gathering supplies like bins and cleaning tools, helps create an efficient decluttering process. Rushing in without a plan leads to half-finished projects and items shuffled from one spot to another without real progress.
Start by creating four distinct zones in a nearby room or hallway. Label each area clearly: keep, donate, toss, and relocate. These zones prevent decision paralysis when you’re holding an item and wondering what to do with it. The physical act of placing something in a specific zone makes the decision concrete and moves you forward.
Gather your decluttering toolkit before opening a single drawer. You’ll need clear storage bins in various sizes, trash bags for genuine garbage, boxes for donations, all-purpose cleaner, microfiber cloths, and a permanent marker for labeling. Having everything within arm’s reach prevents those momentum-killing trips to find supplies mid-project.
Pro Tip: Set a realistic timeline based on your bathroom size. A small half bath might take two hours, while a full family bathroom with extensive storage could require four to six hours spread across multiple sessions.
Clear every surface completely before you begin sorting. Remove everything from countertops, shower caddies, and the top of the toilet tank. This blank slate helps you see your space with fresh eyes and prevents the temptation to simply rearrange clutter. Wipe down these empty surfaces so they’re clean and ready for only the items that truly deserve to return.
| Preparation Step | Time Required | Essential Supplies |
|---|---|---|
| Create sorting zones | 10 minutes | Labels, boxes, bags |
| Gather cleaning tools | 5 minutes | Cleaner, cloths, bins |
| Clear all surfaces | 15 minutes | Trash bags |
| Mental preparation | 5 minutes | Timer, water, music |
Mental preparation matters as much as physical supplies. Acknowledge that you’ll discover expired products and forgotten purchases. That’s normal and exactly why this process helps. Set a timer for focused work sessions and take breaks to maintain energy and decision-making quality. Learn more about creating an organized bathroom foundation through how to organize bathroom strategies.
Step-by-step bathroom decluttering checklist to follow
With your supplies ready and surfaces clear, following a systematic checklist improves decluttering efficiency and ensures no area gets overlooked. Work through each category methodically rather than bouncing between areas. This focused approach prevents overwhelm and creates visible progress that motivates you to continue.
-
Check expiration dates on all medications and first aid supplies. Expired medications lose effectiveness and can become unsafe. Dispose of them properly at pharmacy take-back programs, never down the drain. This single step often clears significant cabinet space.
-
Sort through skincare and beauty products. Examine every bottle, tube, and jar. Toss anything separated, discolored, or smelling off. If you haven’t used something in six months and can’t identify a specific upcoming occasion for it, into the donate box it goes.
-
Evaluate makeup and cosmetics ruthlessly. Mascara expires after three months, liquid foundation after one year, and powder products after two years. Old makeup harbors bacteria that causes skin irritation and infections. When in doubt, throw it out.
-
Declutter hair care products and styling tools. Those travel-size shampoos from hotels three years ago? Gone. Styling products you bought for a specific event and never touched again? Donate them. Keep only what you actively use in your current routine.
-
Review towels and linens for quality. Threadbare towels with holes don’t deserve bathroom real estate. Keep enough sets for your household plus two extras for guests. Donate worn but usable towels to animal shelters.
-
Organize cleaning products and tools. Consolidate duplicate bottles, dispose of anything dried out or ineffective, and relocate general household cleaners to a utility closet if bathroom storage is limited.
Pro Tip: Take before photos of your most cluttered areas. The visual transformation provides powerful motivation when you need encouragement to maintain your new systems.
| Storage Solution | Best For | Space Efficiency | Cost |
|---|---|---|---|
| Drawer dividers | Small items, makeup | High | Low |
| Tiered shelving | Products, towels | Medium | Medium |
| Over-door organizers | Hair tools, cleaning | High | Low |
| Under-sink bins | Bulk items, backstock | Medium | Low |
| Wall-mounted shelves | Display, daily items | High | Medium |
Discover additional decluttering strategies through easy tips to declutter your bathroom and explore specialized guidance for organizing bathroom drawers to maximize every inch of storage space.
Organizing and maximizing bathroom storage space effectively
Decluttering creates space, but smart organization keeps it functional. Effective organization involves choosing the right storage solutions suited to your bathroom layout and how you actually use the space. The best organizational system is one you’ll maintain, not the prettiest one on social media.
Vertical storage transforms small bathrooms. Install floating shelves above the toilet or beside the mirror for items you use daily. Wall-mounted magnetic strips hold bobby pins, tweezers, and nail clippers without taking up drawer space. Adhesive hooks on the inside of cabinet doors create homes for hair dryers, flat irons, and brushes.
-
Use clear containers for visibility. When you can see exactly what you have, you avoid buying duplicates and actually use products before they expire. Label containers for family members or product categories.
-
Implement drawer dividers immediately. Without dividers, drawers become junk magnets within weeks. Adjustable dividers adapt as your needs change and keep small items from migrating into unusable piles.
-
Group items by frequency of use. Daily essentials belong at eye level or in the most accessible spots. Occasional-use items can live in higher cabinets or under-sink storage. Rarely-used items might belong in a linen closet instead.
-
Maximize under-sink space with stackable bins. The area around pipes is awkward, but stackable containers or sliding organizers make it functional. Store backstock items and cleaning supplies here rather than prime real estate.
| Storage Type | Installation | Maintenance | Flexibility |
|---|---|---|---|
| Built-in shelving | Permanent | Low | Low |
| Freestanding units | None | Medium | High |
| Adhesive organizers | Temporary | Medium | High |
| Drawer systems | Semi-permanent | Low | Medium |
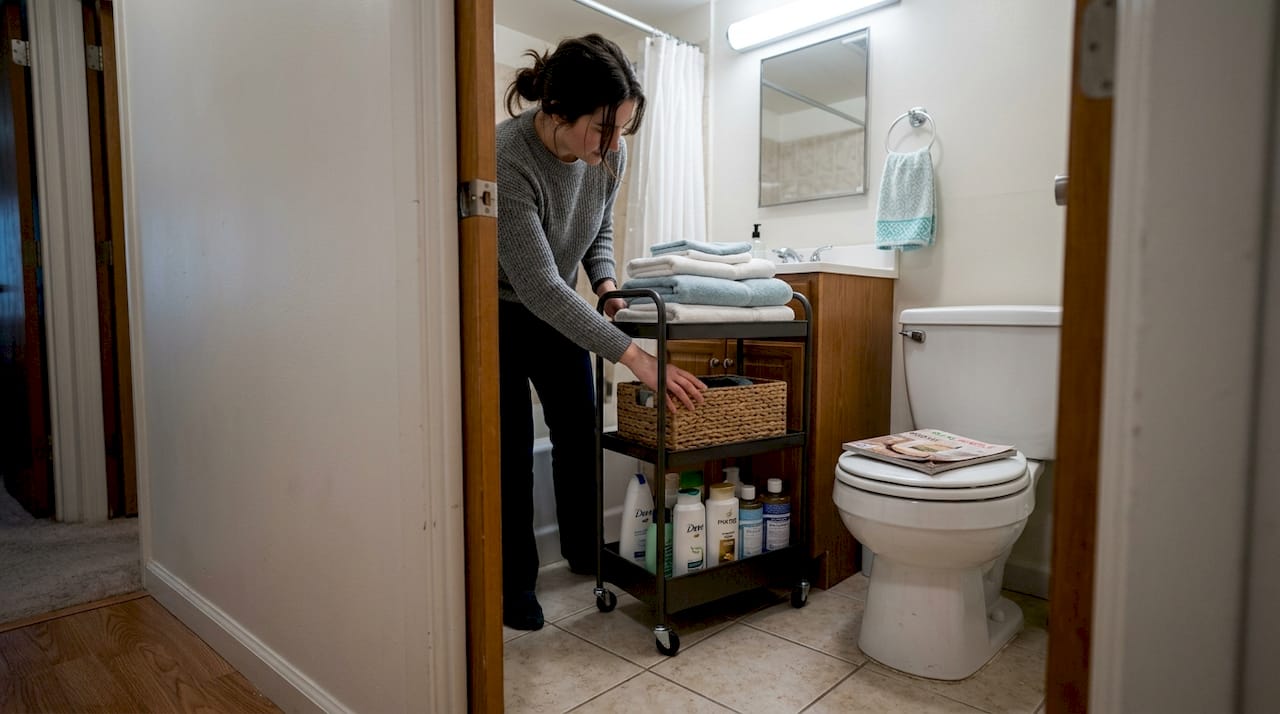
Multi-purpose furniture works wonders in small bathrooms. A narrow rolling cart slides between the toilet and vanity, providing three or four tiers of storage that you can wheel out when needed. An ottoman with internal storage holds extra toilet paper and towels while providing seating.
Expand your organizational knowledge through how to organize bathroom techniques and discover creative solutions via bathroom organization tips that address common storage challenges.
Maintaining a clutter-free bathroom: daily habits and periodic checks
Organizing your bathroom once means nothing if clutter creeps back within weeks. Regular maintenance through daily habits and monthly checks sustains your hard-won order without requiring major time investments. Small consistent actions prevent the buildup that necessitates another massive decluttering session.
Adopt the “one in, one out” rule immediately. When you buy a new moisturizer, finish or discard an old one. This simple practice prevents product accumulation and forces you to actually use what you own. It also makes you more intentional about purchases since you know something must leave to make room.
-
Wipe down surfaces daily. Spend two minutes each evening wiping the counter, sink, and mirror. This prevents grime buildup and makes you notice when clutter starts accumulating.
-
Return items to designated homes after each use. This sounds obvious, but it’s the difference between maintained order and gradual chaos. If putting something away feels inconvenient, your organizational system needs adjustment.
-
Schedule monthly decluttering sessions. Set a recurring calendar reminder for the first Sunday of each month. Spend 15 minutes checking expiration dates, tossing empties, and reassessing what’s earning its space.
-
Involve everyone who uses the bathroom. Family members need to know where things belong and understand the system. A quick family meeting explaining the new organization prevents sabotage through ignorance.
Create a quick morning and evening routine that includes bathroom maintenance. Morning: make sure everything used goes back in its spot. Evening: quick counter wipe and visual scan for anything out of place. These 60-second habits compound into sustained organization.
Pro Tip: Keep a small donation box in your bathroom closet or under the sink. When you realize you’re not using something, immediately place it in the box rather than returning it to its spot. When the box fills, drop it at a donation center.
Periodic deep checks catch problems before they become overwhelming. Every three months, pull everything out of one storage area (this week the medicine cabinet, next quarter the under-sink area) and repeat your initial decluttering process. This rotating system keeps the entire bathroom fresh without requiring hours at once.
Maintain your bathroom’s cleanliness alongside organization through how to clean bathroom naturally methods that support your decluttered space with eco-friendly practices.
Explore more decluttering and organizing resources
Your newly organized bathroom is just the beginning of a calmer, more functional home. Simple Neat Home offers comprehensive guides for decluttering every room in your house, helping you extend this sense of order throughout your living space. Tackle your common areas next with our living room decluttering checklist that applies the same systematic approach to a different space.
Looking for faster results? Our declutter 100 items in 10 days challenge provides the momentum to transform multiple rooms quickly. For a comprehensive approach to your entire home, explore our step by step decluttering guide that walks you through creating lasting systems room by room.
Pro Tip: Combine bathroom decluttering with adjacent spaces like bedroom closets or linen storage for maximum impact and efficiency.
Frequently asked questions
What is the best order to declutter a bathroom?
Start by discarding expired medications and products, which creates immediate space and eliminates items that shouldn’t remain anyway. Next, group remaining items by category so you see exactly what you own in each area. Finally, organize storage spaces with appropriate containers and systems. This sequence prevents you from organizing items you’ll ultimately discard and ensures every keeper has a logical home.
How often should I use a bathroom decluttering checklist?
Use a comprehensive checklist quarterly to maintain control over bathroom clutter and catch accumulation before it becomes overwhelming. Monthly mini-checks focusing specifically on expiration dates and empty containers take just 15 minutes but prevent major buildup. If you share the bathroom with multiple people or have limited storage, monthly full checks work better than quarterly ones.
What are common mistakes to avoid during bathroom decluttering?
Attempting to declutter everything in one exhausting session leads to burnout and incomplete projects. Break the work into focused sessions targeting specific areas or categories. Another mistake is keeping expired or rarely used items out of guilt or “just in case” thinking. If you haven’t used something in six months and can’t identify a specific upcoming need, it’s clutter. Finally, ensure proper disposal or donation of removed items immediately rather than letting bags sit for weeks, which defeats the purpose.
How can I prevent bathroom clutter from returning?
Implement the “one in, one out” rule so new purchases don’t simply add to existing stockpiles. Establish specific homes for every category of item and make returning things to those spots part of your daily routine. Set monthly calendar reminders to check expiration dates and remove empties before they accumulate. Most importantly, involve everyone who uses the bathroom in maintaining the organizational systems you’ve created.
What should I do with partially used products I no longer want?
Donate unopened or barely used products to women’s shelters, homeless shelters, or community organizations if they’re still fresh and unused. Many facilities gratefully accept travel-size toiletries, unopened makeup, and sealed personal care items. For opened products you simply don’t like, consider offering them to friends or family who might enjoy them. If no one wants them and they’re not expired, use them up in creative ways like using lotion as shaving cream or shampoo as hand soap to avoid waste.
Recommended
- How to Organize Bathroom for Maximum Space and Efficiency | Simple Neat Home
- 15 Things You Can Declutter From Your Bathroom TODAY
- 5 Easy Tips to Declutter Your Bathroom | Simple Neat Home
- Ultimate Living Room Decluttering Checklist for a Fresh Space | Simple Neat Home
- 7 Essential Home Organization Hacks for Everyone | Prodcast


